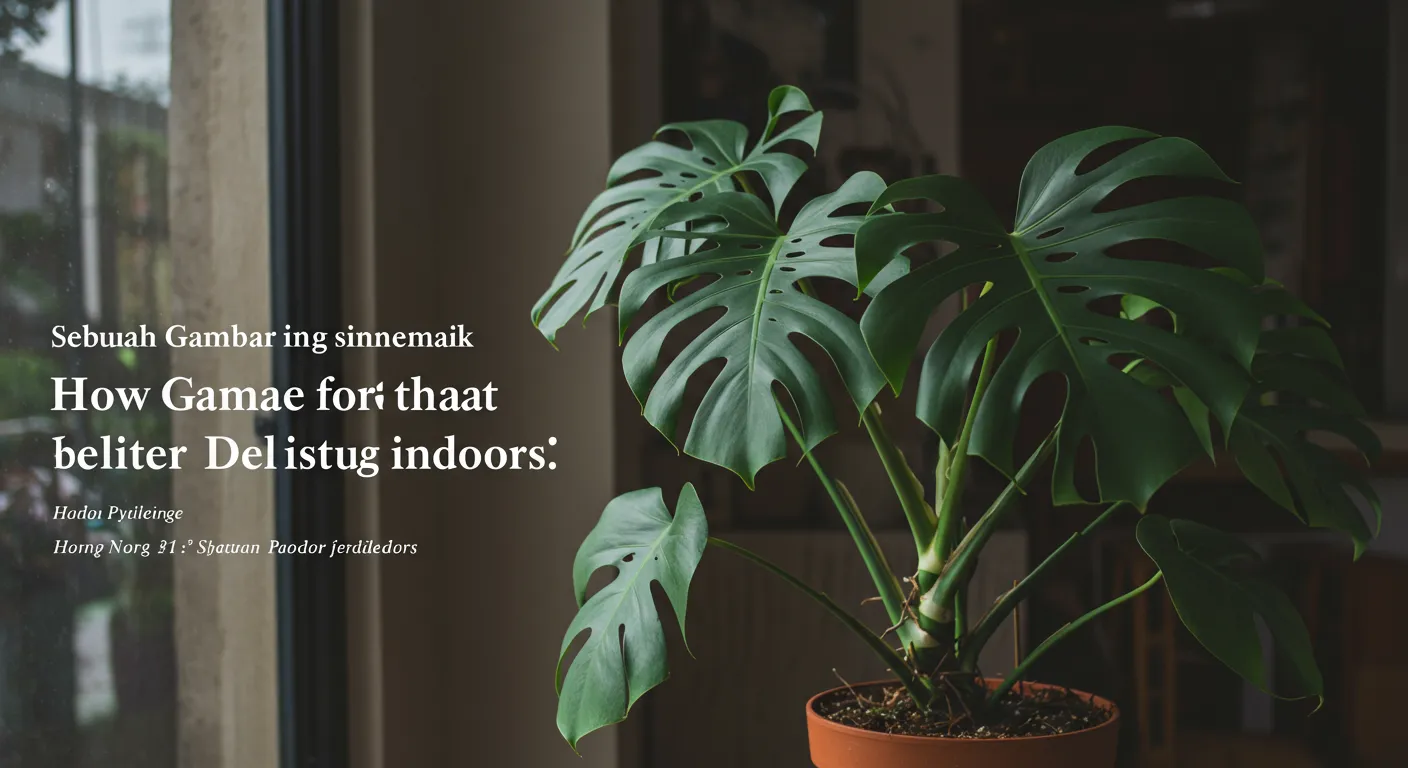
Monstera Deliciosa Care Indoors: What Actually Works (And What I Got Wrong)
Most houseplants want more light than you’re giving them. Monstera deliciosa is no exception but here’s the part nobody mentions: it will survive in low light so convincingly that you’ll think it’s happy for months, right up until you notice the new leaves are coming in small, solid, and utterly split-free. I learned this the hard way with my first Monstera, a leggy little thing I had parked in a dim corner because it looked nice there. It lived. It even grew. It just never thrived. Moving it closer to a bright east-facing window was the single decision that changed everything and it happened within two growth cycles. If your Monstera looks “fine” but isn’t wowing you, light is almost certainly why.
What This Plant Actually Needs to Be Happy
The Swiss cheese plant has a reputation as an easygoing houseplant, and that reputation is mostly earned. But “tolerant” and “thriving” are two very different things. Understanding what this plant genuinely wants versus what it will merely put up with is what separates a plant that looks good from one that stops people in their tracks.
Finding the Right Light (And Why “Bright Indirect” Isn’t Vague)
You’ve heard the phrase “bright indirect light” a thousand times. Here’s what it actually means for a Monstera in a real home: you want a spot where the plant gets a few hours of gentle direct sun (morning sun from an east window is ideal) or sits close enough to a bright window that you could comfortably read a book there without turning on a lamp. That’s the benchmark.
Direct afternoon sun from a south or west window will scorch the leaves you’ll see pale brown, papery patches that don’t recover. But the opposite problem, too little light, is far more common and far more damaging to long-term growth. A Monstera in low light will stop producing fenestrations almost entirely. New leaves come out smaller and whole, like a juvenile plant, regardless of the age of your specimen. If you’ve moved into a darker home and your Monstera’s recent leaves look nothing like the older ones, that’s your answer.
One thing I’ve found works surprisingly well: a sheer curtain over a south-facing window gives you the volume of light without the scorching intensity. My biggest Monstera sits about three feet back from exactly that setup, and it pushes out a new leaf every three to four weeks in spring and summer.
Watering The Part Where Most People Go Wrong
Overwatering kills more Monsteras than any other cause. I know this because I’ve done it. Early in my plant-keeping days I thought a wilting Monstera meant thirst so I watered. And watered. What it actually had was root rot, and more water was the last thing it needed. The leaves of an overwatered Monstera and an underwatered one can look almost identical at first glance.
The only reliable method I use now: finger-test the soil two to three inches deep before watering. If it’s still damp at that depth, put the watering can down and come back in a few days. When you do water, water thoroughly soak the whole root zone until water runs freely from the drainage holes, then let it drain completely. Never leave the pot sitting in a saucer of standing water. The roots need air just as much as moisture, and saturated soil suffocates them.
In my experience, most Monsteras in average home conditions need watering roughly every 7–10 days in summer and every 14–21 days in winter. But I never follow a calendar. The plant tells you when it’s ready.
Humidity and Temperature How Fussy Is It Really?
Honest answer: less fussy than most care guides suggest, as long as you stay within reasonable limits. Monsteras are comfortable in the same temperature range most people keep their homes roughly 65–85°F (18–29°C). Below 60°F and you’ll notice growth slow dramatically; below 50°F and you risk real damage. Keep it away from cold drafts, air conditioning vents, and single-pane windows in winter.
Humidity is where I’d push back slightly on the “just mist it” advice that’s everywhere online. Misting does almost nothing measurable for humidity the moisture evaporates within minutes. If your home is genuinely dry (below 40% relative humidity), a small humidifier near your plant makes a real difference. I use a Levoit Classic 300 in my grow room during winter months, and the difference in leaf texture and size is noticeable. Grouping plants together also creates a modest humidity microclimate that helps.
Soil That Actually Drains
Standard potting mix straight from the bag is usually too dense for a Monstera. It compacts, holds water too long, and doesn’t give the roots the airy environment they need. What you want is a chunky, well-aerated mix that drains fast but still holds some moisture.
My go-to mix is roughly equal parts of a quality potting soil (I use Fox Farm Ocean Forest), coarse perlite, and orchid bark. This gives you drainage, aeration, and enough organic matter to retain nutrients without waterlogging. You can also buy pre-made aroid mixes now they’re more expensive but genuinely good, and worth it if you don’t want to DIY.
Getting Those Splits: What Really Drives Fenestration
The fenestrated leaves the ones with the dramatic holes and splits are what most people are chasing when they bring home a Monstera. And if your plant keeps producing solid leaves, it’s frustrating. Here’s the counterintuitive part: the splits aren’t a sign of a plant at its limit, trying to survive high wind or filter light as commonly explained. They’re a sign of maturity and good health. Your plant only has the energy to produce them when conditions are consistently right.
The Real Connection Between Light and Leaf Shape
Light is the primary driver of fenestration, full stop. A Monstera in low light may be three or four years old and still producing whole, uncut leaves that look like it just came out of a nursery greenhouse. Move that same plant into bright indirect light, and within a few growth cycles the new leaves will start showing splits sometimes dramatically so.
The second factor is age, which you can’t control. Juvenile plants, regardless of conditions, produce solid leaves. But most Monsteras sold at garden centres are old enough to fenestrate they just need the right environment to show it. If you’ve had yours for over a year and the leaves are still solid, the light is the variable to adjust first.
Why a Moss Pole Changes Everything
This one surprised me when I first noticed it, but the evidence across my collection is pretty consistent: Monsteras that have something to climb produce noticeably larger leaves than those left to sprawl or trail. In the wild, these plants grow up tree trunks, and that upward orientation seems to signal to the plant that it’s time to mature.
A moss pole or coir totem lets the aerial roots attach and gives the stem directional support. Once the plant starts climbing rather than drooping outward, you’ll often see a step-change in leaf size within the next few growth cycles. Use soft plant ties to secure the main stem never the leaf stalks and mist the pole occasionally to encourage the aerial roots to grip it.
What to Do With Aerial Roots
Those thick, brown, slightly alien-looking roots that emerge from the stem between leaves are aerial roots, and they’re completely normal. A lot of new plant owners want to cut them off because they look untidy. I’d encourage you not to, at least not aggressively they’re part of how the plant feeds and anchors itself.
Your best options: guide them gently down into the soil where they’ll function as regular roots, tuck them into your moss pole and mist occasionally, or simply let them hang. If one becomes genuinely unmanageable in length, you can trim it with clean scissors just don’t remove large numbers of them at once. I have one Monstera with aerial roots that have grown into the pot on their own, and that plant is the healthiest in my collection.
Feeding and Repotting Without Overthinking It
How and When to Fertilize
Fertilizing is simpler than the gardening industry makes it seem. During the active growing season roughly April through September feed your Monstera once a month with a balanced liquid fertilizer diluted to half the recommended strength. I use Dyna-Gro Grow at about 1/4 teaspoon per gallon of water, and it works consistently well. The key is: more often at lower concentration beats infrequent heavy doses. Over-fertilizing causes salt build-up in the soil, which burns roots and shows up as brown leaf tips.
From October through March, stop feeding entirely. The plant’s growth slows and it simply doesn’t need it. Fertilizing a dormant plant doesn’t speed things up it just stresses the roots unnecessarily.
Repotting: When, How Big, and Why Size Matters
The most common repotting mistake is going too large too fast. I’ve done it grabbed a pot two sizes up thinking I was being generous and ended up with soggy soil and a sad plant for three months. When you repot into a much larger container, all that extra soil holds water the roots haven’t grown into yet. That excess moisture is a root rot waiting to happen.
Go up only one pot size (one to two inches wider in diameter) at a time. Signs it’s time to repot: roots visibly circling the bottom of the pot, roots poking through the drainage holes, or growth that’s stalled despite good light and watering. This typically happens every one to two years for a healthy, actively growing plant. When you repot, shake off as much old soil as you reasonably can, inspect the roots (healthy roots are white or light tan dark, mushy roots mean rot, and those should be trimmed off with clean scissors), and settle the plant into fresh mix at the same depth it was sitting before.
Reading the Warning Signs: Common Problems Decoded
Yellow Leaves There’s More Than One Cause
Yellow leaves are the plant equivalent of a vague text message: something is wrong, but it could mean several different things. The most likely cause is overwatering or poor drainage check the soil moisture and the drainage holes first. But yellow leaves on an otherwise healthy plant can also result from natural aging (the oldest, lowest leaves will yellow and drop over time, and that’s fine), low light, or a nutrient deficiency if you haven’t fed the plant in a long while.
One useful distinction: yellowing that starts at the edges and tips points more toward environmental stress (low humidity, inconsistent watering, or cold drafts), while yellowing that starts in the center of the leaf and spreads outward is more often a root issue. If multiple leaves are yellowing quickly and the soil smells musty or damp, unpot the plant and check the roots.
Brown Patches, Crispy Edges, and What They Mean
Crispy brown edges almost always mean low humidity or inconsistent watering the leaf tips dry out first when the air is too dry or the plant goes too long between drinks. This is cosmetic damage that won’t reverse, but you can stop it from progressing by improving humidity and keeping your watering schedule more consistent.
Brown spots in the middle of the leaf with a yellow halo are more likely sunburn direct sun hitting the leaf surface. Brown spots that look wet or translucent are usually a sign of overwatering or fungal issues, often accompanied by yellowing elsewhere. Move the plant, adjust the watering, and make sure the soil has proper drainage.
Managing Pests Before They Take Hold
The pests most likely to show up on a Monstera are spider mites (tiny specks with fine webbing on leaf undersides, usually in dry conditions), mealybugs (white, cottony fluff tucked into stem crevices), and thrips (small insects that leave silvery streaking on leaf surfaces). Check the undersides of leaves regularly that’s where most infestations start and are easiest to catch early.
As soon as you spot something, isolate the plant immediately. For a minor infestation, wiping down leaves with a damp cloth removes a surprising number of pests physically. For anything more established, I use neem oil mixed with a few drops of dish soap in water, applied as a thorough spray every five to seven days for three to four weeks. Consistency matters more than the product one treatment rarely finishes the job.
Propagating Your Monstera: Two Methods That Work
Once your Monstera is established and growing well, propagation is genuinely one of the more satisfying plant projects you can take on. You get free plants, and the cuttings root reliably as long as you include the right part of the stem.
Water Propagation Simple and Visual
The cutting must include a node that small bump or ring on the stem where leaves and aerial roots emerge. No node, no roots, no matter how long you wait. Take a healthy stem cutting with at least one leaf and one node, ideally with a small aerial root already present. Cut cleanly about an inch below the node with sharp, clean scissors.
Place the node end in a jar of room-temperature water, keeping the leaves out of the water. Set it in bright indirect light, change the water weekly, and within two to four weeks you should see roots developing. Wait until the roots are at least two to three inches long before potting up into soil transferring too early leads to transplant shock. For a smooth transition, I mix a little extra perlite into the potting soil when potting up fresh water-propagated cuttings.
Soil Propagation Fewer Steps, Same Results
If you’d rather skip the water stage, you can propagate directly into a well-draining potting mix. Take the cutting the same way, let the cut end callous for an hour or two, then optionally dip it in rooting hormone powder before planting. Keep the soil consistently moist but never waterlogged, cover loosely with a plastic bag or humidity dome if your home is dry, and place in bright indirect light.
Roots typically establish within three to six weeks. The advantage here is that soil-grown roots don’t need to transition they’re already adapted to their environment. The downside is you can’t see the progress, which makes it harder to know when the cutting is established. Gentle resistance when you tug the stem very lightly is a good sign roots have taken hold.
Frequently Asked Questions
Is Monstera deliciosa toxic to cats and dogs?
Yes. The plant contains calcium oxalate crystals that cause irritation and swelling in the mouth and digestive tract if ingested. Keep it out of reach of pets, or consider a hanging planter or high shelf placement.
How fast should my Monstera grow?
In good conditions strong indirect light, consistent watering, regular feeding in the growing season a mature Monstera can put out one new leaf every three to six weeks in spring and summer. Growth will slow significantly in autumn and winter, which is normal. If it’s been months with no new growth during summer, revisit the light situation first.
Why are my new leaves coming in small and without splits?
Almost always insufficient light. The plant doesn’t have enough energy to produce large, fenestrated leaves. Move it closer to a bright window and give it a few growth cycles you should see the new leaves start improving.
Can I cut my Monstera back if it’s getting too large?
Yes, and it won’t hurt the plant. Cut stems just below a node using clean, sharp scissors. The plant will push new growth from below the cut, often resulting in a fuller shape. And if you save the cuttings with nodes intact, you can propagate them so nothing goes to waste.
If there’s one thing to take away and act on today, it’s this: check your light. Most Monstera problems leggy growth, no splits, slow development, even some watering issues trace back to a plant that’s not getting enough of it. Before you change the soil, adjust the watering, or buy a new fertilizer, move your plant somewhere brighter and give it six to eight weeks. You might be surprised how much that one change fixes.
If you want to go deeper on one specific aspect of this plant, my guide on understanding and managing Monstera aerial roots covers that topic in a lot more detail they’re one of the most misunderstood parts of caring for this plant, and getting comfortable with them makes a real difference.