Have you ever found yourself completely mesmerized by the velvety leaves of a jewel orchid? With their intricate, shimmering veins that look like they've been struck by lightning, it's no wonder why plants like Ludisia discolor and Macodes petola capture our hearts. They feel more like living gems than simple houseplants, a true treasure for any collector.
If you've dreamed of multiplying that magic, you're in the right place. The thought of taking a cutting from such a precious plant can feel a bit nerve-wracking. What if you cut in the wrong spot? We've all been there, hesitating with the clippers in hand, but I'm here to assure you that it’s one of the most rewarding and straightforward propagation projects you can undertake.
This guide is your personal roadmap, designed to walk you through every step with confidence. We’ll demystify the process of how to grow a jewel orchid cutting, from making the perfect snip to watching those first new roots appear. Let’s turn that single treasure into a sparkling family of jewels, together.
You’ve done it! From that first courageous snip to seeing new roots emerge, you now have all the skills you need. Knowing how to grow a jewel orchid cutting is a true milestone, transforming you from a plant owner into a confident propagator. It’s a journey of patience that rewards you with a brand new, thriving plant that you created yourself.
Remember the key steps: a clean cut below a node, choosing your rooting medium, and providing that gentle, consistent care. The process of learning how to grow a jewel orchid cutting is so gratifying, and you should feel proud of your beautiful new plant. Each new leaf that unfurls is a testament to your effort!
Now that you've mastered creating new life from a simple stem, you might be wondering how to encourage those delicate, starry flowers. To continue your journey, take a look at our complete guide on encouraging your jewel orchid to rebloom and keep the magic going.
The Allure of the Jewel Orchid: More Than Just a Pretty Plant
When you hear the word “orchid,” your mind probably jumps to the stunning, showy blooms of a Phalaenopsis. But let me introduce you to a different kind of magic in the orchid family: the jewel orchid. These incredible plants flip the script, focusing all their energy not on fleeting flowers, but on spectacular, year-round foliage.
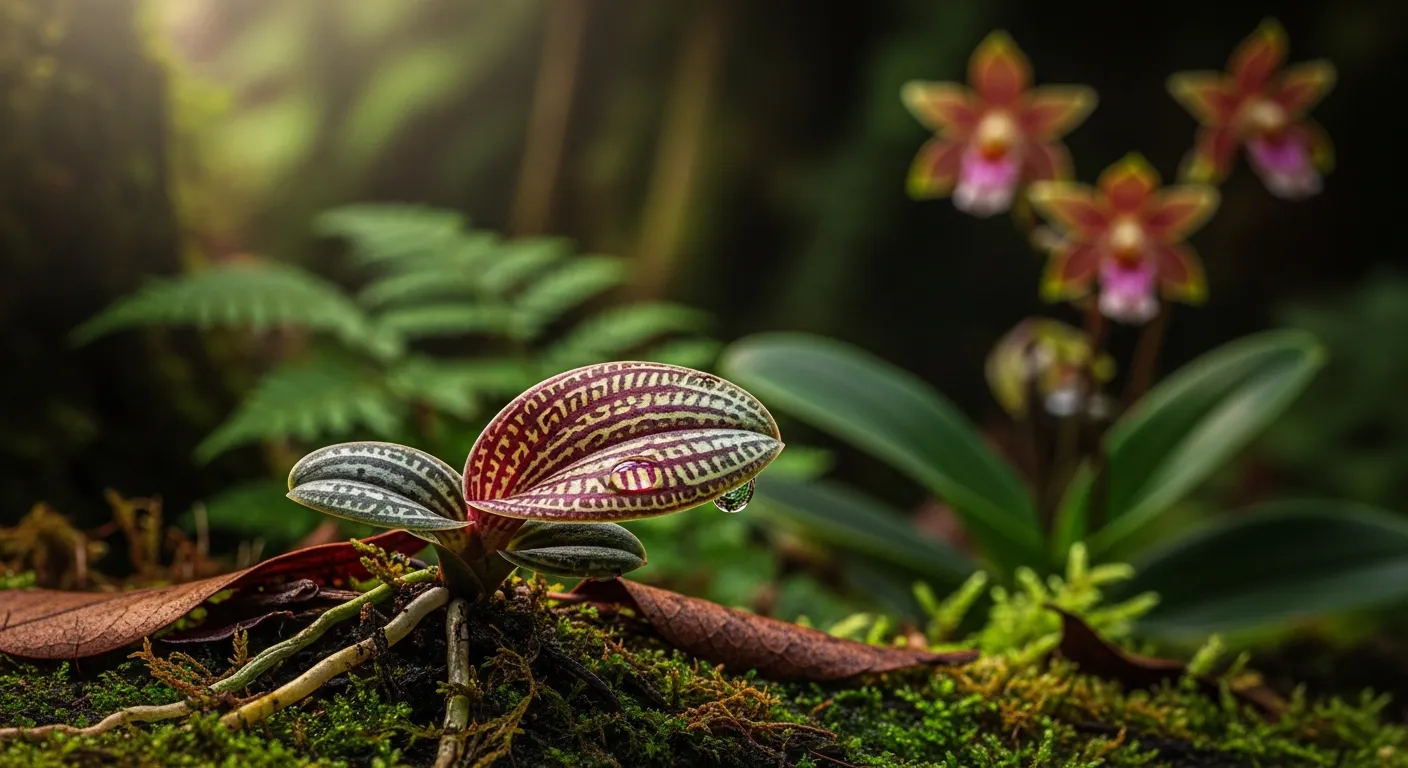
Understanding the jewel orchid begins with appreciating its leaves. They aren't just green; they are living velvet. Imagine deep burgundy, near-black, or rich forest-green leaves etched with a network of electric veins in silver, gold, or coppery-pink. The classic beginner's jewel, Ludisia discolor, has elegant pinstripes, while species like Macodes petola look as if tiny lightning bolts are crackling across their surface.
A huge part of their unique character comes from where they grow in the wild. Unlike many of their cousins who are epiphytes (growing on trees), jewel orchids are terrestrial. They creep along the dappled, humid floor of tropical forests, rooting in the rich leaf litter. This is the secret to their care—they thrive in lower light and higher humidity, conditions that mimic their natural home.
Of course, they do flower! You can expect to see delicate, tall spikes of small, often white or pale pink blossoms. They are incredibly charming and a lovely bonus, but they are a subtle accent compared to the jaw-dropping beauty of the leaves, which remain the main event all year long.
It’s this breathtaking foliage and unique creeping growth that makes them so addictive. Once you have one, you’ll quickly want more. Thankfully, their growth habit makes them incredibly easy to propagate. Learning how to grow a jewel orchid cutting is one of the most rewarding skills, allowing you to easily multiply your collection and share these living gems with others.
Taking the Perfect Jewel Orchid Cutting: Your First Step to Propagation Success
Taking that first snip from a beloved plant can feel a little daunting, but I promise you, jewel orchids like Ludisia discolor are incredibly resilient and eager to grow. The first step in learning how to grow a jewel orchid cutting is getting the cut itself right. We'll walk through this together, ensuring you feel confident and ready.
Before we begin, let's gather a few simple tools. Having everything on hand makes the process smooth and stress-free. You don’t need anything fancy, just the right basics to ensure a clean, healthy start for your new plant.
- A Sharp, Sterile Blade: A clean pair of scissors, pruning snips, or a craft knife will work perfectly. Sterilizing with rubbing alcohol is crucial to prevent transferring any diseases to the mother plant or the new cutting.
- A Healthy Parent Plant: Look for a stem that is firm, vibrant, and has several healthy leaves. Avoid any stems that look limp, yellow, or have signs of pests.
Your Step-by-Step Guide to the Perfect Cut
With your tools ready, it's time for the most important part. A clean cut is the foundation for successfully rooting your jewel orchid cutting. Follow these simple steps for the best results.
- Identify Your Cutting Site: Look for a healthy section of stem with at least two to three leaves. You'll want a few inches of stem below the lowest leaf. Trace the stem down and find a "node" – a small bump or ring where leaves or roots emerge. This is where the new roots will grow!
- Make the Cut: Take your sterilized blade and make a clean, decisive cut about a quarter-inch below a node. A swift cut causes less damage to the plant's vascular system, promoting faster healing and rooting.
- Prepare the Cutting: If the lowest leaf is very close to the cut end, it's a good idea to gently remove it. This prevents the leaf from rotting when you place the cutting in your rooting medium. This simple prep is key to successfully propagating your jewel orchid.
Rooting Your Jewel Orchid Cutting: Two Paths to Success
Alright, you have your precious cutting in hand, and the excitement is real! When it comes to how to grow a jewel orchid cutting, the rooting stage is where the magic begins. We have two reliable methods to get those beautiful roots started, and both work wonderfully for species like Ludisia discolor and Macodes petola. It really comes down to your personal preference.
Method 1: Rooting in Water
This is often the first method people try because it’s so rewarding to watch the roots emerge day by day. It’s a simple and effective technique that gives you a clear view of your cutting's progress. It’s a fantastic confidence booster!
- Prepare Your Vessel: Choose a small, clear glass jar or vase so you can easily monitor root growth. Fill it with filtered, distilled, or rainwater to avoid any harsh minerals.
- Place Your Cutting: Gently place the cutting into the water, ensuring at least one node (the little bump on the stem where leaves grow) is submerged. Crucially, make sure no leaves are touching the water, as this can lead to rot.
- Provide Light and Patience: Set the jar in a spot with bright, indirect light. Now, we wait! You should see tiny white roots begin to form within a couple of weeks.
- Keep it Fresh: Be sure to change the water every 2-3 days. This replenishes oxygen and prevents bacteria from building up, giving your cutting the best chance.
Once the roots are about an inch long, you can gently transfer your cutting to its permanent potting medium. Just be aware that water roots are a bit more fragile than soil roots, so handle with care during the move!
Method 2: Rooting in a Medium
This method is a fantastic approach for successfully growing a jewel orchid cutting because it avoids the potential shock of transferring from water to soil. By rooting directly in a substrate, the new roots are immediately adapted to their future environment.
- Choose Your Medium: We highly recommend using damp (not soaking wet!) sphagnum moss. It provides the perfect balance of moisture retention and aeration that jewel orchids love.
- Prepare the Pot: Fill a small pot or a clear plastic cup with your pre-moistened sphagnum moss. Using a clear cup is a great pro-tip, as it lets you see root development without disturbing the plant.
- Set the Cutting: Lay your jewel orchid cutting horizontally on the surface of the moss, gently pressing it down so the stem makes good contact. You can use a small floral pin or a piece of a paperclip to hold it in place if needed.
- Create a Humidity Dome: Cover the pot with a clear plastic bag or a cloche to create a mini-greenhouse. This high humidity is the secret to success with this method. Just be sure to open it for a few minutes each day to allow for fresh air exchange and prevent mold.
With this technique, you just need to keep the moss consistently moist and wait. In a few weeks, you'll see new growth, which is a sure sign that your efforts in how to grow a jewel orchid cutting have paid off and roots have formed beneath the surface.
From Cutting to Thriving Plant: Essential Care for Your New Jewel Orchid
Congratulations, your cutting has successfully rooted! This is a huge step, and now the real fun begins. The next phase is all about creating the perfect environment to help your little plant mature into the stunning specimen you know it can be. This is where we fine-tune the details that are so crucial when learning how to grow a jewel orchid cutting into a thriving adult.
The Ideal Repotting Medium for Jewel Orchids
Unlike many of their tree-dwelling cousins, jewel orchids (like the popular Ludisia discolor) are terrestrial, meaning they grow on the forest floor. This means they need a medium that holds some moisture but also provides excellent drainage to prevent root rot.
Your goal is to create a chunky, airy, and slightly water-retentive mix. Standard potting soil is far too dense and will suffocate the roots. Instead, we recommend creating your own blend:
- Sphagnum Moss: Provides excellent moisture retention and aeration.
- Perlite or Pumice: Keeps the mix light and prevents compaction.
- Fine-Grade Orchid Bark: Adds structure and improves drainage.
- A Pinch of Charcoal: Helps to "sweeten" the soil and keep it fresh.
A good starting recipe is equal parts of these ingredients. This mix provides the perfect balance of moisture and airflow that your developing jewel orchid cutting needs to establish a strong root system.
Finding the Sweet Spot: Light and Indirect Sunlight
Jewel orchids have evolved under the canopy of dense forests, so they are sensitive to harsh light. Direct sunlight will scorch their beautiful, velvety leaves, causing them to fade or burn. Your mission is to find a spot with bright, indirect light.
Think of the light you'd find a few feet away from an east-facing window, or in a room with a north-facing window. The light should be bright enough to read a book by, but without any direct sunbeams hitting the foliage. If you see the leaves starting to look washed out or reddish, it's a sign of too much light.
Mastering Moisture: Watering and Proper Humidity Levels
This is perhaps the most critical part of long-term success. The mantra for jewel orchids is: consistently moist, but never soggy. Allow the top inch of the medium to feel slightly dry to the touch before watering again. When you do water, do so thoroughly until it runs out the bottom, then let it drain completely.
These plants also adore high humidity (around 60-80%). A dry, centrally heated home can be a challenge. You can easily boost humidity by placing the pot on a pebble tray with water, grouping it with other plants, or using a small humidifier nearby. This small step makes a world of difference in your journey of learning how to grow a jewel orchid cutting.
Feeding Your Growing Jewel: Fertilizer Frequency
As your cutting grows, it will appreciate a little boost of nutrients. However, their root systems are delicate and can be easily burned by too much fertilizer. The best approach is "weakly, weekly."
During the active growing season (spring and summer), use a balanced orchid or all-purpose fertilizer diluted to one-quarter of the recommended strength. Apply this diluted solution with every other watering. In the fall and winter, you can reduce feeding to once a month or stop altogether as the plant's growth slows.
Troubleshooting Common Issues: Keeping Your Jewel Orchid Healthy
Even with the best intentions, you might run into a few bumps along the road. Don't worry, we've all been there! Seeing your beautiful jewel orchid show signs of stress can be disheartening, but most issues are easy to diagnose and fix once you know what to look for.
Decoding Distress: The Problem of Yellowing Leaves
A yellowing leaf is your plant's way of sending an S.O.S. The most common culprit, by far, is overwatering. These terrestrial orchids hate "wet feet," which can quickly lead to root rot. Before you do anything else, check the moisture level an inch or two down into the potting mix.
However, other factors can also cause yellowing. Let's quickly break down the possibilities:
- Overwatering: The leaves, especially lower ones, turn a mushy, translucent yellow. This is the #1 issue.
- Underwatering: The leaves might become yellow but will also look crispy, dry, and wilted.
- Too Much Light: Direct sun can scorch the delicate foliage, causing faded, yellow, or even reddish-brown patches.
- Natural Aging: It's perfectly normal for the oldest, lowest leaf on a stem to occasionally yellow and drop off as the plant grows.
A Note on Phalaenopsis Care vs. Jewel Orchid Care
A major reason growers struggle is applying the wrong care routine. Many people hear "orchid" and think of the common Moth Orchid (Phalaenopsis). But their needs are worlds apart! This is crucial to understand, especially when you are learning how to grow a jewel orchid cutting.
Your Phalaenopsis is an epiphytic orchid, meaning it grows on trees with its roots exposed to the air. In contrast, your Jewel Orchid (like a Ludisia discolor) is a terrestrial orchid, growing on the forest floor in soil. This means it needs a moisture-retentive medium, not an airy bark mix.
The Myth of Cutting a Spent Spike on Jewel Orchids
With many orchids, the standard advice is to cut the flower spike after the blooms fade. For jewel orchids, you should resist this urge! Unlike many of their cousins, jewel orchids frequently produce new plantlets, or "pups," directly from the nodes along the spent flower spike.
Leaving the spike intact is a fantastic and effortless way to propagate your plant and encourage it to become a fuller, bushier specimen. Once the spike has completely dried out and turned brown and crispy, then you can safely trim it off.
Encouraging Your Jewel Orchid to Shine: Tips for Reblooming
While we adore jewel orchids for their stunning, velvety foliage, seeing them produce a delicate flower spike is a truly special reward. If your plant hasn't bloomed yet, don't worry! It's a common challenge, but with a few adjustments, you can definitely encourage it to show off.
First, let's look at the light. Your jewel orchid needs enough energy to produce flowers, and that energy comes from light. Aim for consistent bright, indirect light. An east-facing window with gentle morning sun or a spot a few feet back from a south-facing window is often the perfect location.
Now, here’s one of the most effective tricks: a seasonal temperature drop. Many jewel orchids, especially the popular Ludisia discolor, are prompted to bloom by cooler nights. In the fall, try to create a nighttime temperature dip of about 10°F (5-6°C) compared to the daytime high. This change mimics their natural environment and signals that it’s time to flower.
Your feeding strategy should also change with the seasons. In spring and summer, a balanced fertilizer encourages lush leaf growth. But in late summer or early fall, switching to a bloom booster fertilizer—one with a higher phosphorus number (the 'P' in N-P-K)—can provide the specific nutrients needed for bud development.
Finally, a little patience goes a long way. A young plant or a newly rooted cutting simply may not be mature enough to bloom. It needs time to develop a strong root system and store up energy. Once your plant is well-established and robust, it will have the reserves it needs to put on a floral display for you.
To put it all together, here are the key steps to encourage reblooming:
- Provide Consistent Light: Ensure your plant gets plenty of bright, filtered light every day.
- Initiate a Cool-Down: Introduce a noticeable temperature drop at night during the fall.
- Switch Your Fertilizer: Use a high-phosphorus bloom booster before the blooming season.
- Ensure Plant Maturity: Give your jewel orchid time to grow strong before expecting flowers.