The Orchid Soil Mistake Almost Every Beginner Makes (And What to Use Instead)
Regular potting soil will kill your orchid. Not slowly, not maybe pretty reliably, and faster than you’d expect. I learned this the hard way when I repotted my first Phalaenopsis into a lovely, fluffy all-purpose mix because, well, plants need soil, right? Within six weeks the roots had turned to brown mush. The orchid looked fine from above right up until it didn’t. That was one of the more humbling plant lessons of my first few years, and it’s probably the single most common mistake I see new orchid owners make.
Why Orchids Have Nothing to Do With Soil
Most popular houseplant orchids including the Phalaenopsis you likely picked up at a grocery store are epiphytes. In the wild, they don’t live in the ground at all. They anchor themselves to tree bark high in the forest canopy, where their thick, silvery roots cling to rough surfaces, absorb moisture from passing rain, and dry out almost completely between showers. Air circulation around the roots isn’t a bonus it’s the whole point.
When you plant an epiphyte into dense, moisture-retaining potting soil, you’ve essentially buried a creature that evolved to breathe. The roots suffocate. Water pools around them with no escape. Root rot follows, and by the time you notice wilting or yellowing leaves, the damage is usually already done. This is why the phrase “orchid soil” is a bit of a misnomer what you’re really managing is a potting medium, and that distinction matters enormously.
What Healthy Orchid Roots Actually Look Like
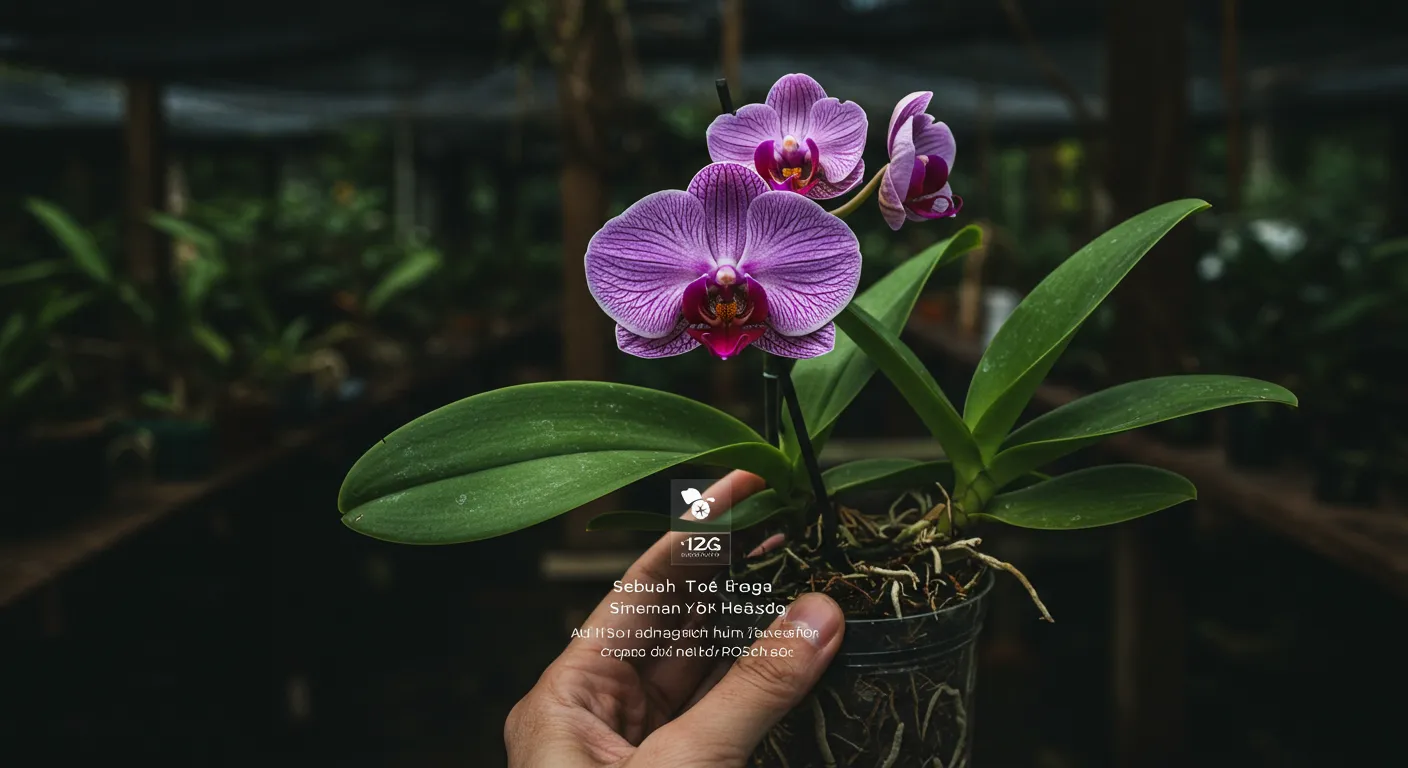
Before you can build the right environment for your orchid, it helps to know what you’re aiming for. Healthy Phalaenopsis roots are firm to the touch, and they shift between silvery-white when dry and a vivid green when recently watered. That color change is one of the things I genuinely love about growing orchids in clear plastic pots you can see exactly what’s happening without disturbing the plant at all.
Roots that are brown, hollow, papery, or mushy are in trouble. One thing that surprises a lot of people: some aerial roots (the ones climbing out over the pot rim) are perfectly normal and healthy. Don’t shove them back in. They’re doing exactly what orchid roots do in nature reaching out into open air.
What Goes Into a Good Orchid Potting Mix
A proper orchid potting medium is chunky, open, and almost nothing like soil. The goal is a mix that anchors the roots, holds a small amount of moisture after watering, and then dries out relatively quickly while keeping air pockets around the roots at all times. Here are the components worth understanding:
- Fir bark is the backbone of most commercial and DIY orchid mixes. The chunky pieces create structure and airflow, hold a modest amount of water, and break down slowly over time which matters because decomposing bark is one of the main reasons you need to repot every couple of years.
- Horticultural charcoal is worth adding even in small amounts. It absorbs excess mineral salts from fertilizer and tap water, which keeps the root zone from building up a residue that interferes with nutrient uptake a problem most growers don’t discover until their orchid stops responding to feeding.
- Perlite or LECA (lightweight expanded clay aggregate) adds drainage and prevents compaction. These are inorganic, so they don’t break down, and they’re especially useful if you tend toward overwatering.
- Sphagnum moss is a moisture superstar it can hold many times its own weight in water and releases it gradually. Used on its own, it can stay too wet for too long; blended into a chunky bark mix, it adds useful humidity retention without the waterlogging risk.
- Coconut coir or coco husk chips are a sustainable alternative to sphagnum. They break down more slowly and retain moisture well, making them a solid choice if you’re environmentally minded or just can’t find good-quality moss locally.
Choosing the Right Grade for Your Orchid
Orchid mixes come in fine, medium, and coarse grades, and the difference matters more than most beginners realize. The general rule: thicker, fleshier roots want coarser material that dries fast; finer, more delicate roots need smaller particles that hold a bit more moisture.
Medium grade is the right call for most home growers with mature Phalaenopsis, Cattleya, or Dendrobium orchids. It’s forgiving enough for slightly irregular watering habits and widely available. Coarse grade suits orchids like Vanda that have enormous, vigorous roots and genuinely need to dry out completely between waterings. Fine grade is best reserved for seedlings, baby orchids, or terrestrial species like Paphiopedilum (slipper orchids), which are semi-ground-dwelling and appreciate a little more consistent moisture.
Pre-Made Mixes vs. Blending Your Own
Honestly, for most people with one to five orchids, a quality pre-packaged mix is completely fine. I’ve had good results with rePotme’s Phalaenopsis Imperial Orchid Mix it uses a fir bark and charcoal base and has consistent particle sizing, which matters if you’re buying in bulk. The downside of any pre-made mix is that you can’t verify freshness, and old bark that’s already starting to decompose is worse than no bark at all.
If you grow more than a dozen orchids or want to dial in for specific species, blending your own is worth the learning curve. A solid starting ratio for most epiphytic orchids is roughly 60–70% medium fir bark, 20% perlite, and 10–15% horticultural charcoal. From there, you can adjust based on how quickly your home dries things out.
Matching the Medium to Your Specific Orchid
One size genuinely doesn’t fit all here, and getting this right is the difference between an orchid that thrives for years and one that limps along looking vaguely unhappy. Different orchid genera come from different native habitats, and their root systems reflect that.
- Phalaenopsis (Moth Orchids) are the most common houseplant orchid for a reason they’re adaptable. A medium-grade fir bark or coco husk mix works well. They like to dry out between waterings but not completely, so a small amount of moisture-retention material in the mix helps.
- Cattleya and Dendrobium orchids have thicker, more robust roots that prefer much faster drainage. Go coarser with the bark, skip the sphagnum, and let the mix dry out almost entirely before watering again. These genera come from seasonally dry habitats and have evolved to handle drought far better than waterlogging.
- Paphiopedilum (Slipper Orchids) are semi-terrestrial, meaning they do grow in leaf litter and soil pockets in the wild. A mix of fine-grade bark with added sphagnum moss and a bit of perlite suits them well they want more consistent moisture than a typical epiphyte but still need the drainage.
- Oncidium Alliance orchids often have very fine roots and do best in fine-to-medium grade bark, sometimes with a little sphagnum mixed in to prevent the mix from drying out too fast between waterings.
When and How to Repot Without Stressing Your Plant
Here’s something counterintuitive: the best time to repot an orchid is right after it finishes blooming, not when it’s in active flower. I know it feels wrong to interfere with a healthy-looking plant. But disturbing the roots while the plant is pushing energy into maintaining blooms adds unnecessary stress. Wait for the last flower to drop, then act.
Signs Your Orchid Is Ready for Fresh Medium
Your orchid will give you clear signals. The medium has broken down and turned dense and soil-like if it no longer looks chunky or has compacted into a dark, fine mass, it’s failing at its one job. Roots are escaping in every direction and circling densely inside the pot. The plant rocks noticeably when you touch it, which means the root system has lost its anchor. Or it’s simply been 18–24 months since the last repot, even if things look fine on the surface. That last one trips people up: organic bark is decomposing from day one, and waiting for obvious visual decline usually means waiting too long.
A Straightforward Repotting Process
- Remove the orchid gently. Squeeze the sides of a plastic pot or, if it’s really stuck, cut the pot away. Forcing the plant out can snap roots.
- Clear away all old medium. Get rid of every bit of the old bark or moss don’t let any decomposed material hitch a ride into the new pot.
- Inspect the root system honestly. Using sterilized scissors, trim any roots that are brown, hollow, or mushy. Leave firm, green or white roots alone. A light dusting of ground cinnamon on fresh cuts acts as a natural antifungal.
- Choose a pot one size up. Going too large is a common mistake more medium means more moisture held around the roots, which increases rot risk. One size up is plenty.
- Add fresh medium and position the plant. Work the chunky mix around the roots gently, tapping the pot to help it settle. The crown of the plant should sit just at or slightly above the pot rim.
After repotting, hold off on watering for two to three days. This allows any trimmed root ends to callus over rather than immediately sitting in moisture. I also move freshly repotted orchids to a slightly shadier spot for a week lower light means less transpiration stress while the plant re-establishes.
Watering, Feeding, and Getting the Environment Right
The potting medium only works as well as your watering habits allow. The most common advice I give people is this: throw out whatever schedule you’ve been following and start using the medium itself as your guide.
How to Water an Orchid Properly
The ice cube method placing ice cubes on the medium and letting them melt slowly has become popular because it feels controlled and gentle. I understand the appeal, but cold water applied directly to tropical roots isn’t ideal, and the slow trickle often doesn’t hydrate the entire medium evenly. A better approach is the soak-and-drain method.
Take the orchid to a sink and run lukewarm water through the pot for about a minute, letting it flow freely out of the drainage holes. Alternatively, submerge the pot in a bowl of water for five to ten minutes. Then and this is the critical part let it drain completely before putting it anywhere near a decorative pot or saucer. Standing water beneath the pot is one of the fastest ways to undo everything a good potting medium is doing for you. I check my orchids every seven to ten days by lifting the pot: a dry one is noticeably lighter, and that’s the cue to water.
Fertilizing Without Overcomplicating It
Bark and moss are structurally excellent but nutritionally poor, so regular, diluted feeding matters. A balanced orchid fertilizer the widely available 20-20-20 formulation works well diluted to half or quarter strength, applied weekly during active growth (spring and summer) and monthly in fall and winter, is the standard approach. Always water first, then apply fertilizer to already-damp roots; applying to dry roots increases the risk of fertilizer burn.
One thing most guides skip: flush the medium with plain water every four to six weeks to clear accumulated mineral salts. Tap water and fertilizer both leave residue that, over time, raises the salt concentration around the roots and stresses the plant. A thorough flush takes two minutes and makes a real difference.
Light, Humidity, and the Environment Around the Pot
Most popular orchids especially Phalaenopsis evolved under forest canopy, not in direct sun. Bright, indirect light from an east-facing window is usually ideal. A south or west-facing window can work if you pull the plant back from the glass or filter the light with a sheer curtain. If the leaves feel warm when you touch them mid-afternoon, move the plant further from the window.
Humidity is something most indoor environments don’t naturally provide enough of. Orchids prefer 50–70% relative humidity, and a typical heated or air-conditioned home often runs well below that. A humidity tray a shallow tray with pebbles and water, with the pot sitting on the pebbles above the waterline is a low-effort fix. Grouping plants together also raises ambient humidity slightly as they transpire. If you have a larger collection, a small dedicated humidifier is the most reliable solution and worth the minor investment.
Diagnosing Problems Through the Potting Medium
Most orchid problems trace back to what’s happening in the medium, even when the symptoms show up on leaves or blooms. Learning to read the signs early saves plants.
Yellow Leaves and What They Usually Mean
A single lower leaf yellowing and dropping is normal it’s just the plant shedding old growth. Multiple leaves turning yellow, especially newer or middle leaves, is a different story. The most common cause is a medium that’s staying too wet for too long, whether from overwatering or because decomposed bark is no longer draining properly. The roots suffocate, lose function, and can’t transport water or nutrients upward which shows up as yellowing foliage. If the medium smells sour or looks like soil rather than bark chips, it’s past due for replacement.
Dealing With Root Rot When It Happens
Root rot isn’t necessarily a death sentence if you catch it while healthy roots remain. The approach is surgical: unpot the orchid completely, remove every trace of old medium, and cut away every root that is brown, mushy, or hollow. Be ruthless here leaving even partially affected roots behind is a mistake I made early on, and the rot continued spreading. Dust cuts with cinnamon, let the plant air-dry for an hour or two, then repot into completely fresh medium. Don’t water for two to three days post-repotting.
Going forward, the fix is almost always either reducing watering frequency or replacing a medium that has broken down and is holding too much moisture. For detailed guidance on getting your orchid to rebloom after a health setback, our guide to caring for orchids while blooming covers what healthy plants need once they’re back on track.
The pH Problem Most Growers Never Think About
As organic materials like bark and moss break down, they become increasingly acidic. This matters because it affects how available nutrients are to the roots even if you’re fertilizing consistently, a pH that’s drifted too low “locks out” minerals like calcium and magnesium. The plant looks underfed despite being fed. The fix isn’t a pH adjustment product it’s regular repotting into fresh medium, which resets the chemical environment alongside the physical one. This is one more reason the 18–24 month repotting schedule isn’t just a guideline; it’s doing real work.
The Single Thing to Take Away From All of This
If I could go back and tell my earlier self one thing about orchid care, it would be this: check the medium before you check anything else. Before adjusting watering, before blaming light, before worrying about fertilizer pull the plant out and look at the roots. Healthy, airy medium with firm green-white roots means you’re on the right track. Dense, dark, compacted material with mushy roots means the foundation needs fixing first.
Everything else the feeding schedule, the humidity tray, the east-facing window builds on top of that foundation. Get the potting medium right, repot on schedule, and your orchid has every structural reason to reward you with new growth and repeat blooms. That part really does follow naturally once the roots are happy.
