
Orchid Aerial Roots: 7 Honest Answers to What They Mean and What To Do
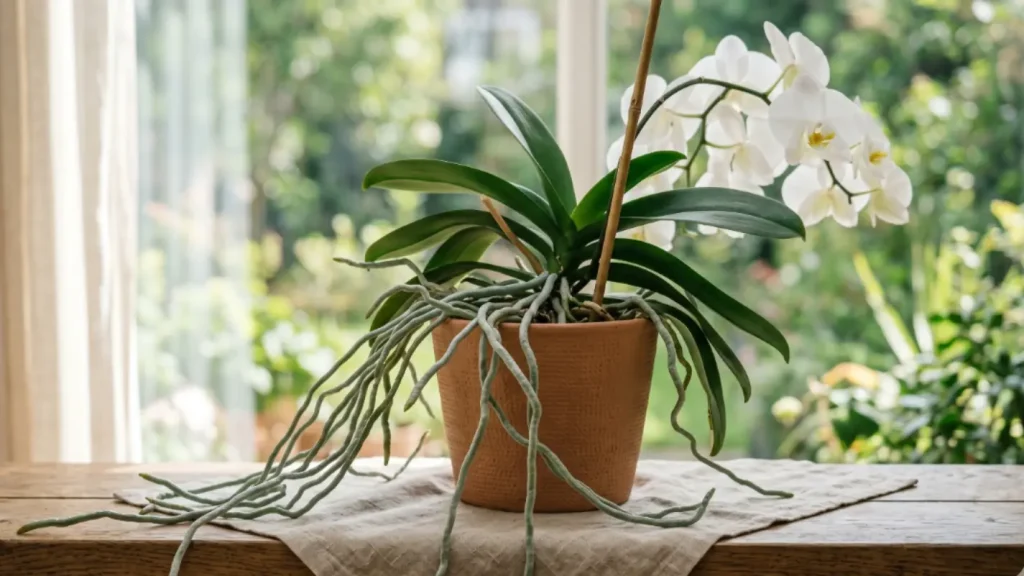
My first Phalaenopsis a white one I picked up from IKEA back in 2016 was growing these thick, pale roots that were crawling out of the pot and snaking across my windowsill. I was convinced something was wrong. I googled it, panicked a little, and spent twenty minutes trying to stuff every one of them back into the bark mix. That was a mistake. Orchid aerial roots are not a problem to fix. They’re actually one of the clearest signals your plant gives you and reading them right changes how you care for everything else.
- What Orchid Aerial Roots Actually Are
- Why Your Orchid Is Sending Roots Into the Air
- What To Do With Aerial Roots (And What Not To Do)
- When Aerial Roots Signal a Real Problem
- Healthy vs. Unhealthy Aerial Roots at a Glance
- The One Thing to Do Today
What Orchid Aerial Roots Actually Are
Most houseplants root exclusively in soil. Orchids particularly epiphytic ones like Phalaenopsis, Cattleya, and Dendrobium evolved growing on tree bark in humid tropical forests. Their roots were never meant to live underground. They anchor the plant to a host surface and pull moisture directly from humid air, rainfall, and passing mist.
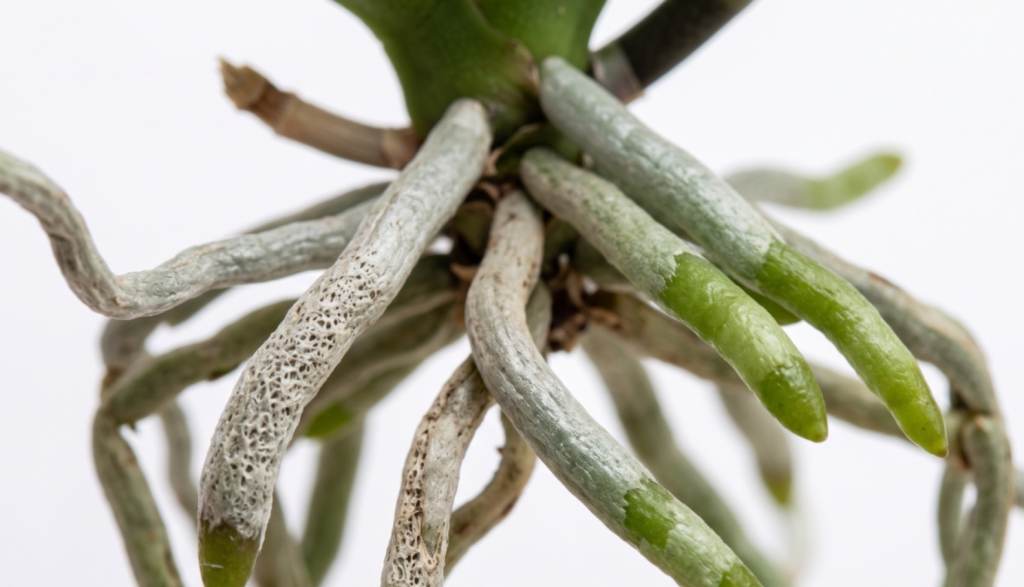
The outer layer of an orchid root is called velamen. It’s a spongy, multi-layered tissue that absorbs water rapidly and holds it just long enough for the inner root to drink. That’s why a healthy aerial root looks silvery-white when dry and turns bright green the moment it gets wet you’re watching the velamen flood with moisture in real time.
So when roots grow up and out of the pot, they’re not escaping bad conditions. That’s just what orchid roots do. The Missouri Botanical Garden notes that most popular houseplant orchids are epiphytes by nature their aerial root growth is completely normal behavior.
Why Your Orchid Is Sending Roots Into the Air
Here’s the part most care guides skip: the number and direction of aerial roots tells you something specific. A plant pushing out lots of new roots is generally a healthy, actively growing orchid. Roots reaching upward or outward are searching for more moisture in the air around them.
If the aerial roots are all pointing toward a bright window, that’s worth paying attention to. Roots have some photosensitivity they’ll grow toward indirect light because in nature, that’s where the humid, open air tends to be. It’s not a care crisis; it’s just the plant orienting itself.
One thing I’ve noticed with my own collection: orchids in plastic pots tend to push more roots outward than those in terracotta. Plastic traps moisture longer, which can make the potting medium feel “full” to the roots, encouraging them to look elsewhere. If you’re seeing a lot of aerial root activity, check whether your bark mix is broken down and compacted that’s often the underlying trigger.
Aerial roots on an orchid are more like a status update than a distress signal. Read them, don’t remove them.
What To Do With Orchid Aerial Roots (And What Not To Do)
Leave them alone. That’s the honest answer. I know it’s tempting to tuck them back into the pot or trim them for tidiness, but neither of those things helps the plant and cutting healthy roots opens the door to rot and fungal infection.
What actually helps is misting aerial roots lightly a few times a week if your home is dry. They absorb moisture from the air, and in a centrally heated room in winter, there often isn’t much moisture for them to work with. A quick mist in the morning not at night, which risks fungal issues makes a real difference.
If roots are growing over the edge of the pot and you find it genuinely unsightly, repotting into a slightly larger clear pot is the right move. Don’t cut the roots to make them fit. Instead, follow proper technique for handling orchid aerial roots during repotting the goal is to coil healthy roots gently inside the new container without snapping them.
- Do mist them in dry conditions. A spray bottle with room-temperature water once or twice a week keeps velamen functional without soaking the medium.
- Do let them roam. Roots growing outside the pot are still doing their job absorbing ambient humidity and stabilizing the plant.
- Don’t cut healthy green-tipped roots. An active growing tip is one of the best signs your orchid is in good health. Removing it sets the plant back.
- Don’t stuff them forcibly into bark. I learned this the hard way forced roots snap at the base, and snapped roots rot.
- Don’t cover them with moss to hide them. Wrapping aerial roots in wet sphagnum sounds kind but suffocates them and invites rot at the root neck.
When Orchid Aerial Roots Signal a Real Problem
Most aerial roots are fine. But there are a few specific things worth inspecting when you notice them, because the roots are one of the best early warning systems an orchid gives you.
Brown, mushy roots aerial or otherwise mean rot. This usually starts at the base where roots meet the potting medium, and it often happens because the bark stays wet too long between waterings. If more than a third of the root system is soft and brown, the plant is in trouble and needs immediate repotting with all the dead root tissue cut away with a sterile blade.
Shriveled, cord-like roots that don’t plump up after watering are dehydrated. This happens when the velamen is damaged sometimes from being misted with cold water, sometimes from a mineral buildup if you’re using tap water. If your aerial roots stay wrinkled even after watering, try switching to filtered or rainwater for a few weeks and see if that changes things. For more detail on caring for orchids indoors, including watering best practices, that guide covers the basics well.
The Royal Horticultural Society’s orchid care guidance also points out that yellowing at the root base can indicate overwatering worth checking if you’re not sure whether to water more or less.
Healthy vs. Unhealthy Orchid Aerial Roots at a Glance
| What You See | What It Means | What To Do |
|---|---|---|
| Silvery-white, firm, with green tip | Healthy, actively growing root | Leave it. Maybe mist if air is dry. |
| Turns bright green when watered | Velamen working correctly, good hydration | Nothing this is ideal |
| Brown and mushy at the base | Root rot, usually from overwatering | Repot immediately, cut dead roots |
| Shriveled and stays wrinkled after watering | Velamen damage or dehydration | Switch to filtered water, increase humidity |
| White and papery but firm | Dormant but alive not actively growing | Normal between growth cycles, leave alone |
| Yellow at the base, softening | Early rot or overwatering | Let medium dry out fully before next watering |
The One Thing to Do Today
Go look at your orchid’s roots right now aerial and potted ones both. If you have a clear plastic pot, you can see the potted roots through the sides. Check the tips: are they green and firm? Is the velamen silvery and intact? If yes, you’re in good shape. Put the pot down and leave it alone.
If the roots look shriveled or the bark in the pot has broken down to a fine, soggy mush, that’s your signal to repot before the next growing season. Fresh medium makes more difference to aerial root health than any misting routine or humidity tray ever will. Get the roots into clean bark and the plant will tell you everything is fine by sending out more of them.