Orchid Care Indoors: What Nobody Tells You Until You’ve Already Killed One
I killed my first orchid by loving it too much. Watered it twice a week, kept it on a warm sunny shelf, and wondered why the roots turned to brown mush within a month. The plant I replaced it with has been blooming reliably for four years and the only thing that changed was me finally understanding that orchids aren’t houseplants in the traditional sense. They’re air plants that happen to grow beautiful flowers. Once that clicked, everything else got easier.
If you’ve recently brought one home or you’re nursing a sad, leafy stick that used to have flowers this guide on how to care for orchids indoors will give you exactly what you need without the fluff.
Why Orchids Are Nothing Like Other Houseplants
Most indoor plants grow in soil. Orchids, at least the popular ones, don’t. In their natural habitat, they anchor themselves to tree bark and rocks, pulling moisture and nutrients from humid air and the occasional rain shower. That single fact explains almost every mistake beginners make: too much water, too dense a potting mix, not enough airflow around the roots.
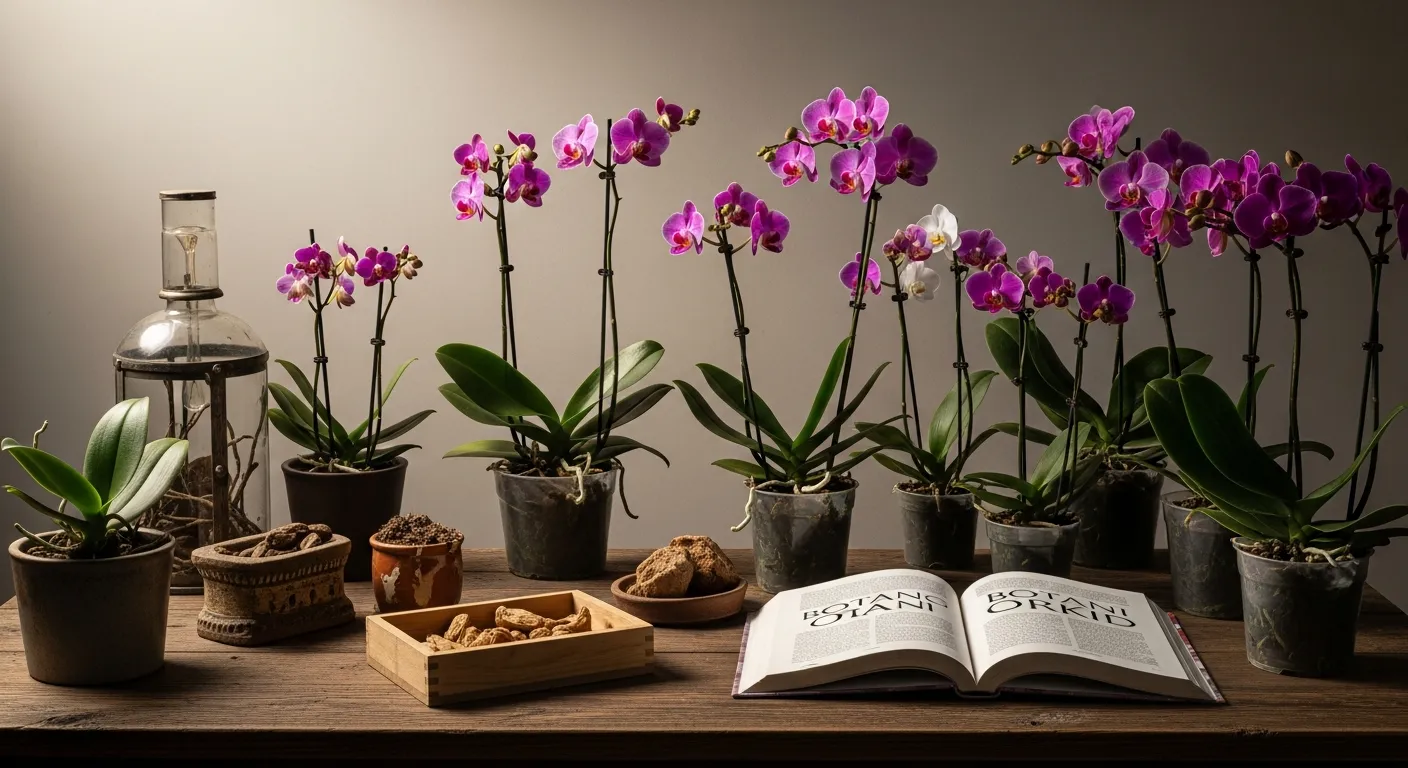
The most common orchid you’ll find is the Phalaenopsis, also called the Moth Orchid. It’s the one with arching stems and wide, flat flowers, sold in every grocery store and hardware shop. These are genuinely beginner-friendly when you understand their logic not because they’re forgiving of neglect, but because their needs are actually quite consistent and readable once you know what to look for.
How to Tell If Your Orchid Is Happy (Before It Tells You Otherwise)
Healthy Phalaenopsis leaves should be a medium olive-green firm, slightly waxy, and flat. If they’re dark green and floppy, the plant isn’t getting enough light. If they’re yellowing or tinged red or purple, there’s too much direct sun. The leaves are essentially a real-time report card, and learning to read them early saves a lot of guesswork later.
The roots are equally informative. Inside a clear plastic nursery pot (which I strongly recommend over ceramic), healthy roots look silvery-white when dry and bright green right after watering. Brown, hollow, or mushy roots mean something’s gone wrong usually too much water sitting around them for too long.
Light, Water, Humidity, and Feeding Getting the Basics Right
These four things are the foundation of indoor orchid care. Get them reasonably right and your plant will do most of the work itself.
Finding the Right Light Without Burning the Leaves
Bright, indirect light is the standard recommendation and it’s correct, but it needs context. “Bright” means genuinely bright: a spot next to an east-facing window, or back a couple of feet from a south or west-facing one. Most windowsills that feel bright to us are actually quite dim by plant standards.
Direct sun through glass, especially in the afternoon, will scorch the leaves within a day or two. I’ve done it came home to a bleached, papery patch right in the middle of a perfectly healthy leaf. A sheer curtain between the plant and a south-facing window is a simple fix that makes a big difference.
One non-obvious detail: orchids grown in slightly lower light will survive but rarely rebloom reliably. If yours keeps producing leaves but no flower spikes, moving it somewhere brighter is usually the answer.
The Watering Approach That Actually Works
Overwatering is the single most common reason orchids die indoors. The roots need air as much as they need moisture, and sitting in wet bark for days at a time starves them of oxygen. My rule: wait until the potting mix is dry and the pot feels noticeably lighter before watering again. In most homes, that’s roughly every 7–10 days in summer and every 12–14 days in winter.
When you do water, do it properly. Take the pot to the sink and run lukewarm water through it for a full minute, letting it drain completely out the bottom. Never leave the pot sitting in a saucer of water that’s just slow-motion root rot. I use room-temperature water and avoid getting any into the crown of the plant (the centre where the leaves emerge), which can cause bacterial rot if it sits there.
If you have very hard tap water with visible mineral deposits, consider using filtered or rainwater. I collect rainwater in a bucket on my balcony during the wet season it takes about five minutes of effort and the plants respond noticeably well to it.
Humidity: What Actually Helps vs. What Doesn’t
Orchids prefer humidity around 50–60%, which is higher than most homes maintain, particularly in winter when heating dries everything out. The common advice to mist the leaves sounds logical but actually causes more problems than it solves water pooling in the crown can lead to fungal rot, and the humidity benefit lasts about three minutes.
What genuinely works:
- A pebble tray with water: Place a shallow tray filled with pebbles and water beneath the pot, making sure the pot itself sits above the waterline. As the water evaporates, it raises the humidity around the plant without ever touching the roots.
- Grouping plants together: Plants naturally release moisture through their leaves. Clustering several together creates a slightly more humid microclimate it’s subtle but real, and it’s free.
- A small humidifier: If you have several orchids or live in a particularly dry climate, a compact ultrasonic humidifier running nearby is the most reliable solution. I run mine from October through March.
Feeding Without Overdoing It
Orchids are light feeders. Over-fertilizing is a genuine risk too many nutrients burn the roots and create salt buildup in the potting medium that takes months to flush out.
During the growing season (spring through summer), I feed every watering with a balanced orchid fertilizer diluted to quarter-strength. I use Dyna-Gro Orchid Pro, which has served me well across many of the orchids in my collection. In autumn and winter, I cut back to once a month or skip entirely. Once a flower spike appears, I switch to a bloom-boosting formula higher in phosphorus to support the flowering process this genuinely makes a difference to both the number of buds and how long they last.
Caring for Phalaenopsis Specifically: The Details That Matter
Because the Moth Orchid is what most people actually own, it deserves its own section. The general principles above apply, but there are a few specifics worth knowing.
Temperature and the Reblooming Trigger Most People Miss
Here’s something that surprises most orchid owners: Phalaenopsis orchids need a temperature drop to initiate a new flower spike. They won’t bloom again without it. A consistent 10–15°F (5–8°C) difference between daytime and nighttime temperatures for several weeks is what signals the plant that it’s time to start producing flowers.
In practice, this happens naturally in autumn when nights cool down and windows near the plant get cooler. If you keep your home at a steady warm temperature year-round, your orchid may grow lush and healthy without ever reblooming because it never receives the trigger it needs. Moving the plant near a window in September and October (away from drafts) usually does the job.
What to Do With the Flower Spike After Blooming
Once all the flowers have dropped, you have two options with the spent spike. If it’s still green, you can cut it back to just above one of the nodes (the small triangular bumps along the spike) this sometimes encourages a secondary branch of flowers. If the spike has turned brown and dry, trim it cleanly at the base.
Honestly, my experience is that cutting all the way down usually produces a more vigorous rebloom the following season. The secondary spike flowers tend to be smaller and fewer, and the plant expends energy that it could use to build a stronger root system and new leaves. Both approaches work it depends on whether you want a potential second bloom sooner, or a bigger show later.
Repotting: When and How to Do It Without Causing Panic
Orchids need repotting every one to two years not because they’ve outgrown the pot, but because the bark breaks down over time, becoming dense and waterlogged. When the mix starts looking more like soil than chunky bark, it’s time.
Other signs it’s time to repot: roots are circling tightly inside the pot or pushing dramatically out the drainage holes, the plant is tilting unstably, or the mix stays wet for unusually long after watering.
Use a specialized orchid bark mix never regular potting soil. The how to care for orchids indoors principle of good airflow applies most critically here: dense soil suffocates the roots within weeks. When repotting, trim any dead, mushy, or papery roots with sterile scissors, then move the plant into a pot just one size larger with fresh bark. I always sterilize my pruners with rubbing alcohol before and after it takes ten seconds and prevents spreading any fungal issues between plants.
Reading Problems Before They Get Serious
Orchids communicate through their leaves and roots. The sooner you learn to read the signals, the easier the fixes become.
Yellow Leaves, Wrinkled Leaves, and What They’re Really Saying
A single yellowing leaf at the base of the plant the oldest one is normal aging. Don’t worry about it. Widespread yellowing across multiple leaves, however, almost always points to overwatering and root rot. Pull the pot, check the roots, and trim anything brown and mushy.
Wrinkled or leathery leaves are the confusing one, because they can signal either underwatering or the aftermath of overwatering that destroyed the root system. The plant looks thirsty either way. Always check the roots first: if they’re healthy but the medium is bone dry, water thoroughly. If the roots are damaged, the problem isn’t lack of water it’s lack of functioning roots to absorb it.
Bud Blast: Why Buds Drop Before They Open
Few things are more frustrating than watching perfectly formed buds turn yellow and fall off before opening. This is called bud blast, and it’s almost always caused by a sudden environmental change a cold draft, a blast of dry heat from a nearby vent, a move to a different location, or exposure to ethylene gas from ripening fruit sitting close by.
Once a Phalaenopsis starts setting buds, stability is everything. Don’t move it, don’t repot it, keep it away from the fruit bowl, and make sure no heating or air conditioning vent is blowing directly on it. The buds are the most vulnerable stage of the whole cycle.
Common Pests and How to Handle Them Quickly
Indoor orchids can pick up pests, usually from nearby plants. The ones to watch for:
- Mealybugs: These appear as white cottony fluff, often tucked into leaf joints or where a leaf meets the stem. Wipe them off with a cotton swab dipped in 70% isopropyl alcohol and treat the whole plant with diluted neem oil spray.
- Scale: Hard brown or tan bumps clinging to stems and leaves. They’re stubborn same treatment as mealybugs, but you may need to repeat it several times over a few weeks.
- Spider mites: Almost invisible individually, but they leave a tell-tale fine silvery webbing on the undersides of leaves. A thorough wash-down of the foliage and a neem oil application usually handles a mild infestation.
Isolate any affected plant immediately that part is non-negotiable. Pests spread faster than you’d expect.
Pots, Mixes, and the Tools Worth Having
Why Clear Plastic Pots Are Worth It
I know ceramic pots are prettier. I use them too but as outer sleeves, not as the actual growing vessel. Clear plastic nursery pots let you see the roots at a glance, which tells you more about the plant’s health than almost anything else. Green roots mean recently watered. Silvery-white roots mean it’s time. Brown and hollow means something’s gone wrong.
If you use a decorative cachepot, always tip out any water that collects in the bottom after watering. Orchid roots sitting in standing water even just an inch of it will rot.
Potting Mix, Stakes, and Sterilized Pruners
Good orchid bark mix contains fir bark, perlite, and often charcoal. It should look chunky and open, not dense. Pre-made orchid mixes from reputable brands are fine I’ve used rePotme Classic Orchid Mix for years with consistent results.
For tools: a pair of clean, sharp scissors or small pruners (sterilized every time), bamboo stakes in a few sizes, and soft orchid clips for supporting the flower spike as it grows. These are inexpensive and make every maintenance task significantly easier.
Common Questions, Answered Simply
How long do the flowers last? For a healthy Phalaenopsis, expect two to three months of bloom. Consistent care, stable temperatures, and keeping the plant away from fruit and drafts will maximize that window.
Can I use tap water? Usually yes. If you have very hard water or notice a white mineral crust building up on the bark or pot edges, switch to filtered or rainwater, or flush the pot thoroughly with plain water once a month to clear salt buildup.
What are those roots growing out of the pot? Aerial roots completely normal and actually a sign of a healthy plant. Leave them alone. In their natural habitat, orchid roots grow through open air, not buried in anything.
What’s an easier orchid after mastering Phalaenopsis? The Paphiopedilum (Slipper Orchid) tolerates lower light well and has a similar watering logic. The Cattleya needs brighter light but rewards you with large, intensely fragrant flowers unlike anything the Moth Orchid produces.
The One Thing That Makes the Biggest Difference
If you take nothing else from this guide, take this: check the roots, not just the leaves. The leaves show you what happened last week; the roots show you what’s happening now. A plant with healthy, firm, well-colored roots will almost always recover from surface-level problems. A plant with rotted roots is in genuine trouble regardless of how green the leaves still look.
Get into the habit of lifting the pot, glancing through the plastic, and reading what you see. It takes about three seconds and will catch problems before they become unfixable. That single habit has saved more of my orchids than any fertilizer or product ever has.
Once you’re comfortable with your Phalaenopsis, it’s worth reading our guide to extending and maximizing orchid blooms there are a few timing tricks in there that make a real difference to how long and how often your orchids flower.