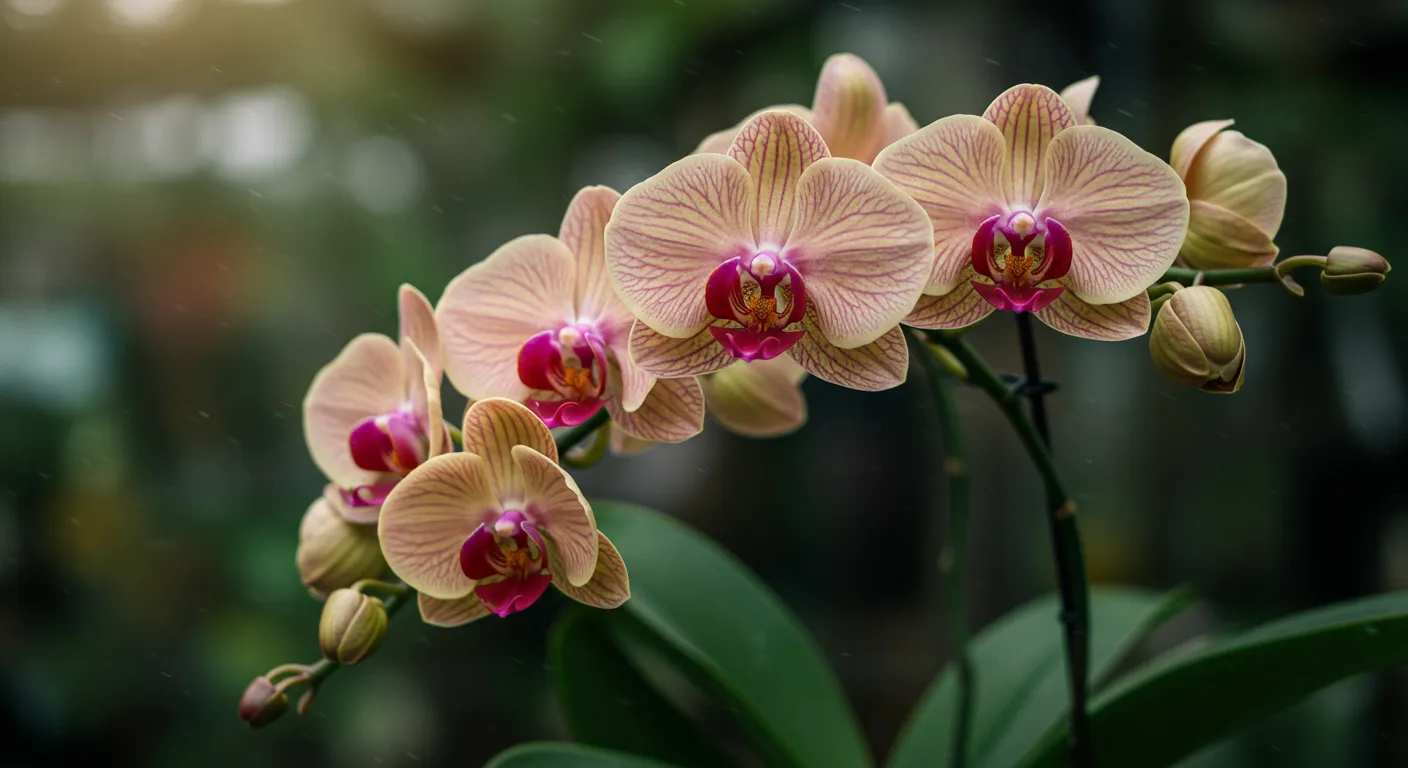
How to Care for Orchid Blooms (Without Killing the Mood or the Flowers)
Most people overwater their orchid the moment it blooms. I know because I did it too convinced that a flowering plant must need extra fuel, I drenched my first Phalaenopsis in celebration and watched every bud shrivel within a week. That was ten years and about 300 plants ago. What I’ve learned since is that blooming orchids actually want less from you, not more. A little strategic neglect goes a long way.
Whether your orchid just opened its first flower or you’re mid-bloom and starting to panic about every dropped petal, this guide covers what actually keeps those flowers going and what quietly kills them before their time.
What’s Really Happening When Your Orchid Flowers
Here’s something most care guides skip: by the time your orchid opens its blooms, the hard biological work is already done. The plant spent months building the energy to produce that flower spike. Now it’s essentially coasting which means your job during bloom isn’t to feed and stimulate it, but to keep things stable enough that it can finish what it started.
For a healthy Phalaenopsis (the most common type you’ll find at garden centers and grocery stores), blooms typically last one to three months. Dendrobiums and Oncidiums run shorter sometimes just a few weeks. Knowing what you’re working with helps set realistic expectations and stops you from blaming yourself when flowers naturally fade.
The Bloom Cycle Isn’t a Problem to Solve
Once the last flower drops, the plant shifts into a rest and recovery phase. It’s not dying. It’s not sad. It’s doing exactly what it’s supposed to do rebuilding energy in its leaves and roots so it can bloom again. The mistake most people make is treating the post-bloom period as a failure and either overcompensating with fertilizer or giving up on the plant entirely.
I keep my post-bloom orchids on a dedicated shelf in my sunroom a kind of “recovery ward,” as I call it. They get consistent light, minimal watering, and basically no fuss. Almost all of them spike again within six months.
The Conditions That Keep Orchid Blooms Going Longer
Stability is the word I’d tattoo on every orchid pot if I could. Blooming orchids are surprisingly sensitive to environmental disruption, and most premature bloom drops a phenomenon called bud blast come down to one sudden change the plant couldn’t handle.
Light: Bright, But Not Brutal
An east-facing window is about as close to perfect as you’ll get for a blooming Phalaenopsis. The morning light is gentle and consistent. South or west-facing windows can work if the plant sits a few feet back from the glass direct afternoon sun will bleach the petals and shorten the display significantly.
One thing I’ve noticed in my own collection: orchids that bloom in lower light tend to hold their flowers longer, but the colors are often paler. Orchids in brighter spots bloom with richer color but sometimes for a shorter window. Neither is wrong it’s just a trade-off worth knowing about.
Temperature and Airflow: Boring Is Good
Aim to keep blooming orchids in a spot where the temperature stays between 65–80°F (18–27°C) and doesn’t swing dramatically between day and night. Cold drafts from windows or heat blasts from vents are two of the fastest ways to trigger bud drop.
I lost almost an entire spike of buds one winter because I’d placed a new orchid near a radiator that kicked on unexpectedly at night. The plant dropped every unopened bud in about 48 hours. Lesson learned: feel the air around your plant’s spot at different times of day before committing it to a location.
Humidity: Good Air, Not Wet Petals
Orchids like humidity somewhere in the 40–70% range is comfortable. But here’s the part that trips people up: never mist the flowers directly. Water on petals is a fast path to Botrytis, a fungal petal blight that shows up as brown or black spots and spreads quickly in humid, stagnant conditions.
Instead of misting, try one of these approaches:
- Pebble tray method: Place the pot on a tray filled with pebbles and water, making sure the bottom of the pot sits above the waterline. The evaporating water raises ambient humidity around the plant without wetting the blooms.
- Group your plants: Plants naturally release moisture through transpiration clustering your orchid with other houseplants creates a slightly more humid microclimate. I do this with my collection and it makes a noticeable difference in dry winters.
- Small humidifier nearby: If your home runs particularly dry, a small humidifier a few feet from your orchid works well. I use a Levoit LV600 near my orchid shelf through the colder months.
Watering a Blooming Orchid (Less Is More, Seriously)
The counterintuitive truth: a blooming orchid usually needs slightly less water than one that’s actively pushing out new leaves. Growth phases demand more resources. Bloom phases demand stability.
For bark-potted Phalaenopsis, I wait until the bark is almost completely dry and the aerial roots have turned silvery-gray before watering. That typically works out to about once every 7–10 days in my home, though your conditions will vary. For sphagnum moss, it retains more moisture, so the interval stretches to 10–14 days depending on pot size.
How to Water Without Damaging Blooms
Pour lukewarm water directly onto the potting medium never let it pool in the crown of the plant or splash onto open flowers. Let the pot drain completely in the sink before returning it to its spot. Sitting water at the root level causes rot faster than almost anything else.
One scenario I see constantly: people water their orchid by dunking the decorative outer pot along with the inner nursery pot, then wonder why the roots are rotting. Always water the inner pot separately and let it drain before setting it back in the decorative sleeve.
Fertilizing During Bloom: When to Back Off
Most experienced growers myself included stop fertilizing entirely when the orchid is in full bloom. The plant has already done the work. Pushing more nutrients into it at this stage rarely extends the bloom and can sometimes shorten it by encouraging vegetative growth at the expense of flower maintenance.
If you feel compelled to fertilize (I understand the urge), use a balanced formula like Dyna-Gro Grow diluted to one-quarter strength, no more than once a month. Save the heavier feeding for the post-bloom recovery phase, when the plant is actually building new growth and can use the fuel.
Bud Blast and Premature Flower Drop: What’s Actually Going On
Bud blast is when buds drop before they ever open, and it’s one of the most frustrating things that can happen to an orchid grower. The plant was so close. The culprit is almost always stress and it’s usually something in the environment, not a watering mistake.
The Most Common Triggers
- Ethylene gas from ripening fruit: This one surprises most people. Bananas, apples, and other ripening fruit release ethylene gas, which signals plants to speed up their own cycle including dropping flowers. Keep blooming orchids away from the kitchen fruit bowl. I moved mine across the room after losing two spikes to my banana bunch.
- Sudden temperature swings: A cold draft through an open window at night, or a heat vent turning on nearby, can cause the plant to conserve energy by aborting buds it can no longer support.
- Drastic watering changes: Going from too dry to waterlogged in one session shocks the root system. The roots signal stress to the plant, and the plant responds by dropping what it can’t sustain.
- Relocating mid-bloom: Moving an orchid that’s actively blooming especially to a significantly different light environment is a gamble. If you need to move it, do so gradually over several days if possible.
Pest Problems on Orchid Flowers (and How to Handle Them Gently)
Blooming orchids can attract aphids and mealybugs, which are drawn to the soft, sugary tissues of buds and flower stems. The challenge is treating an infestation without damaging the petals in the process.
Skip the spray bottles entirely when flowers are open any liquid on petals risks spotting or accelerating petal blight. Instead, dip a cotton swab in 70% isopropyl alcohol and dab each pest individually. It’s tedious, but it’s precise and safe for the blooms. For larger infestations, you may need to make the hard call: remove and discard the infected spike to protect the rest of the plant.
If you see dark spots spreading across the petals usually gray-brown with a waterlogged look that’s likely Botrytis. Increase airflow around the plant, stop any misting, and remove affected blooms immediately. A small fan nearby on the lowest setting can help prevent it from recurring.
When the Last Flower Falls: What to Do Next
Once flowering is done, you have a decision to make about the flower spike, and what you choose can affect whether you get a second bloom sooner rather than later.
Your Options for the Spent Spike
- Cut to the base: If the spike has turned yellow or brown and dry, cut it off close to the base. This is the right move for a weaker plant redirecting all energy toward root and leaf recovery sets the plant up for a stronger rebloom later.
- Trim above a node: If the spike is still green and firm, you can cut it about an inch above a node (the small triangular bumps along the stem). This sometimes encourages a secondary branch of flowers. The blooms tend to be smaller, but it can extend your season if the plant is healthy.
- Wait and observe: A still-green spike sometimes produces new buds from the tip on its own. I’ve had orchids surprise me this way after I’d already written the spike off. If it starts yellowing, trim it then.
Coaxing a Rebloom
The most reliable trigger for a new flower spike on a Phalaenopsis is a consistent nighttime temperature drop of about 10–15°F (5–8°C) over several weeks usually in autumn. Moving the plant near a slightly cooler window at night (without exposing it to cold drafts) often does the trick. This isn’t a trick or a hack; it’s mimicking the natural seasonal cues the plant evolved with.
Once you see a new spike emerging it looks like a small, mitten-shaped green nub near the base of a leaf resume regular watering and light feeding. That’s the plant telling you it’s ready to go again. For a deeper look at the full recovery process, our guide on caring for orchids after they bloom walks through every stage.
Quick Answers to Common Orchid Bloom Questions
How long should orchid blooms actually last?
A healthy Phalaenopsis in stable conditions can hold its flowers for two to three months occasionally longer. Cattleyas typically run two to four weeks. Dendrobiums are somewhere in between. If your blooms are dropping significantly before that window, environmental stress is almost always the culprit rather than anything wrong with the plant itself.
My orchid hasn’t bloomed in over a year what’s wrong?
Nine times out of ten it comes down to two things: insufficient light and no temperature cue. A Phalaenopsis with very dark green leaves is telling you it’s not getting enough light move it closer to a bright window. And if your home stays at the same temperature year-round, the plant has no seasonal signal to trigger a new spike. Try exposing it to cooler nighttime temperatures (around 55–60°F / 13–15°C) for four to six weeks and see what happens.
Can I repot while my orchid is blooming?
My honest advice: don’t. Repotting is a significant stressor, and combining it with the energy demands of active blooming is asking a lot of the plant. Wait until the blooms have naturally faded and the plant has had at least a few weeks to rest. Then assess the roots and repot if needed using fresh orchid bark.
The One Thing That Actually Makes the Biggest Difference
If you take nothing else from this, take this: stop moving your orchid once it’s in bloom. Pick a spot with bright, indirect light, stable temperatures, and no drafts and leave it there until the last flower drops. More orchid blooms are lost to relocation, windowsill drafts, and well-meaning fussing than to any actual care mistake. Find the right spot, commit to it, and let the plant do its thing.
