November Cactus Care: What Most Guides Get Wrong (And How to Actually Get It Blooming)
Most people treat their November cactus like a desert plant minimal water, bright direct sun, dry soil and then wonder why it’s sitting there looking crispy and resentful. I did the exact same thing when I first got one. Within two months the pads had gone red, the roots were shriveling, and I’d completely misread every symptom. The irony? This plant comes from humid Brazilian rainforests. It has more in common with an orchid than a saguaro. Once I understood that, everything changed and I’ve had mine blooming reliably every November for the past six years.
What You’re Actually Dealing With (It’s Not a Desert Plant)
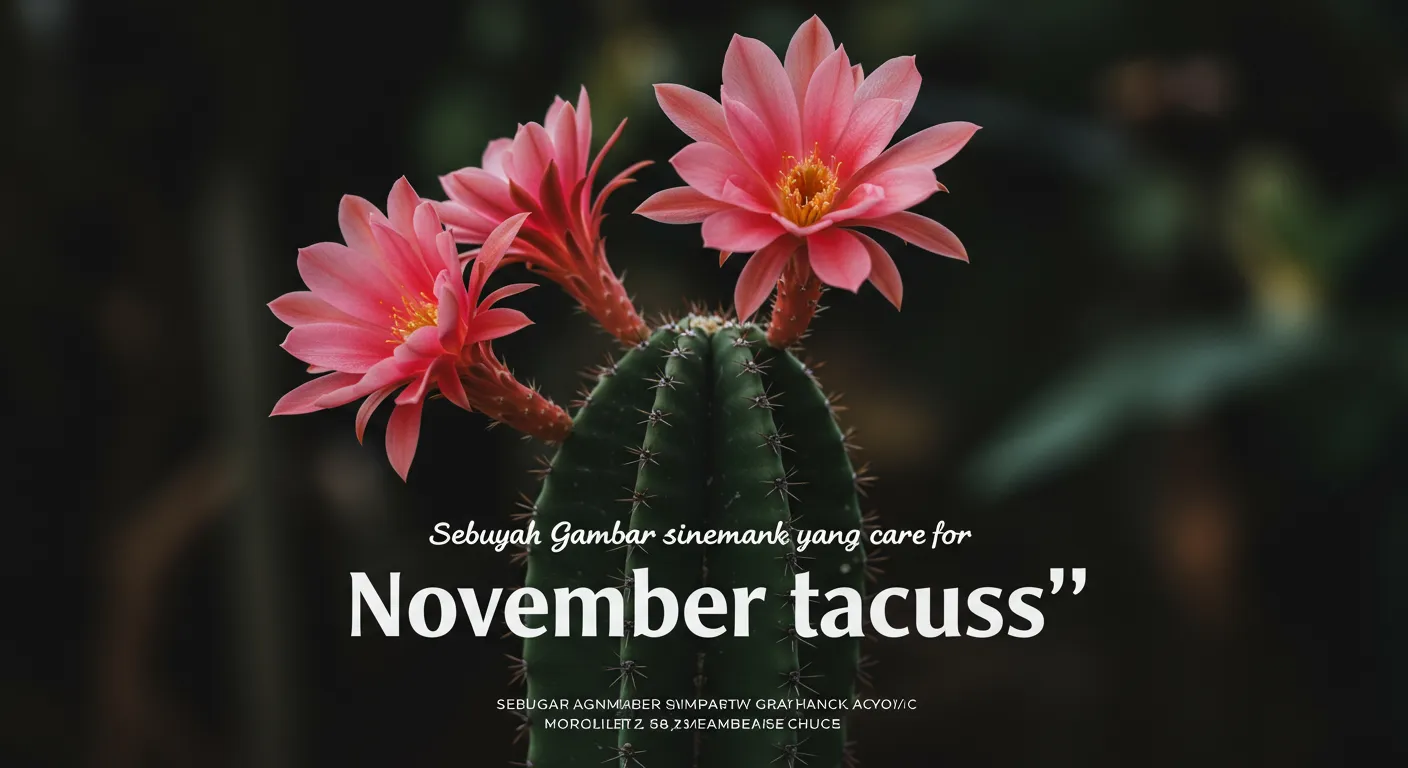
The Schlumbergera truncata sold as November cactus, Thanksgiving cactus, or occasionally just “holiday cactus” is a tropical epiphyte. In the wild, it grows wedged in tree bark in the coastal mountains of southeastern Brazil, where humidity is high, light is filtered through a forest canopy, and the soil equivalent (decomposed organic matter in bark crevices) drains almost instantly. That one piece of context explains why standard cactus care advice fails this plant completely.
It’s also worth knowing exactly what you have, because “holiday cactus” gets applied pretty loosely at garden centers. The November cactus has stem segments with pointed, claw-like serrations along the edges almost like small teeth. Run your finger along the edge of a segment and you’ll feel them. The Christmas cactus (Schlumbergera bridgesii) has smooth, rounded, scalloped edges. The bloom time is also a giveaway: your November cactus should naturally want to flower from late October into early December, while the Christmas version tends to push later, closer to December and January. The care is nearly identical for both, but knowing which you have helps you time the bloom trigger correctly.
Light, Temperature, and Where to Actually Put This Thing
Bright, indirect light is the target. An east-facing windowsill is genuinely ideal gentle morning sun, no harsh afternoon rays scorching the pads. A few feet back from a south or west-facing window also works well. What you want to avoid is direct midday sun hitting those flattened stem segments; they’ll go yellow or develop a reddish blush, which is a stress response, not a healthy glow.
One thing that surprises people: this plant actually benefits from spending summer outdoors. I move mine to a shaded back porch every June, and the difference in how full and vigorous it looks by September is noticeable. Just make sure it’s genuinely shaded dappled light under a tree or the shadowed side of the house, not full sun. Bring it back inside before nighttime temps drop below 50°F (10°C).
For indoor temperatures, anywhere between 65–75°F (18–24°C) during the day is comfortable. The plant tolerates the range most of us keep our homes at, which makes life easy. Humidity is where people often fall short, especially in winter when central heating dries the air out. I keep mine on a wide saucer filled with pebbles and water the pot sits on the pebbles above the waterline, so it gets a constant gentle humidity boost without sitting in moisture.
Watering: The Actual Cause of Most Problems
Here’s the honest truth about watering a November cactus: the word “cactus” in the name has probably killed more of these plants than anything else. People underwater them, the roots suffer, the pads wrinkle and then in a panic they overwater, which triggers root rot. It’s a cycle I’ve watched happen with friends who’ve asked me why their plant looks terrible.
During spring and summer (the active growing season), keep the soil consistently moist but never waterlogged. Stick your finger about an inch into the soil; if it feels dry at that depth, water thoroughly until it drains from the bottom, then empty the saucer. Don’t let the pot sit in pooled water that’s the fastest path to root rot for an epiphyte whose roots evolved to drain immediately.
In fall, when you begin the bloom-trigger period, pull back noticeably. Water only sparingly just enough to prevent the pads from shriveling. This mild drought stress, combined with cooler temperatures and longer nights, is what tells the plant it’s time to set buds. I use a moisture meter (I’ve had a XLUX T10 for years and it’s held up well) to take the guesswork out of fall watering, because the consequences of getting it wrong right before bud set are frustrating.
Diagnosing Watering Problems
Limp, wrinkled pads can mean two completely opposite things, which is maddening. Here’s how to read the situation:
- Soil is dry and pulling away from the pot edges: Classic underwatering. The pads feel thin and leathery. Water thoroughly and the plant should perk up within 24–48 hours.
- Soil is damp or soggy and pads still look limp or feel mushy at the base: Likely root rot from overwatering. Stop watering immediately, let it dry out fully, and if it doesn’t improve, unpot the plant and check the roots. Trim away any brown, slimy roots and repot in fresh, well-draining mix.
- Pads are going red or purple despite consistent watering: Usually a light or temperature stress response too much direct sun or a cold draft. Check its position before assuming it’s a watering issue.
The Soil Mix That Actually Suits This Plant
Standard potting mix is too dense and moisture-retentive for a November cactus. Pre-made cactus or succulent mixes are better, but many are still too gritty and nutrient-poor for a plant that actually likes some organic matter. My go-to blend is one part standard potting soil, one part perlite, and one part orchid bark. It drains fast, holds just enough moisture, and gives the roots something to grip.
Repot every two to three years in spring, moving up only one pot size. These plants actually bloom better when slightly root-bound I learned this after repotting a perfectly healthy specimen into a much larger pot and watching it skip blooming almost entirely that year. The stress of too much empty soil volume seems to distract it from flowering. Go up gradually.
The Bloom Trigger: This Is Where Most People Give Up
If your November cactus has been sitting there producing nothing but green pads year after year, this section is why. The plant is a short-day bloomer, meaning it needs a period of long, dark nights combined with cooler temperatures to initiate bud formation. It won’t just decide to bloom on its own indoors you have to create the right conditions.
Start around mid-September and maintain the following for six to eight weeks:
- 12–14 hours of complete, uninterrupted darkness each night: This is non-negotiable, and “uninterrupted” matters more than people realize. Even a few minutes of light someone flipping on a lamp in the room, a streetlight through a gap in the curtains can reset the hormonal signal and delay budding. I move mine to the spare bedroom closet each evening and take it out in the morning. Yes, every night. It’s worth it.
- Cooler nighttime temperatures in the 50–58°F (10–14°C) range: A cool room with the heat turned down, a lightly ventilated porch, or near (but not touching) a cool window. The temperature drop is a secondary cue that reinforces the darkness trigger having both working together is more reliable than relying on just one.
- Reduced watering and no fertilizer: The mild stress of slightly drier soil during this period supports budding. Resume regular care once you see buds forming at the pad tips.
Once small pink or red bud nubs appear usually after four to six weeks of treatment you can stop the darkness routine and move the plant back to its normal spot. Here’s the critical part: don’t move it again. Bud drop is almost always caused by sudden changes in light, temperature, or position after buds have set. Find your display spot and leave it there for the whole bloom period.
Feeding Your Plant Through the Seasons
During the growing season (roughly April through August), I feed every two to three weeks with a balanced liquid fertilizer. In late summer around August I switch to a phosphorus-heavy “bloom booster” formula. Phosphorus (the middle number in the N-P-K ratio on the label) supports flower development, and giving the plant a few weeks of it before the darkness treatment seems to contribute to heavier bud set. Once the darkness period begins in September, stop all feeding. Resume a balanced fertilizer in spring after the plant has rested for a month post-bloom.
Propagating Stem Cuttings (It’s Genuinely Easy)
If you want to multiply your plant or pass one along to a friend November cactus is one of the most forgiving plants to propagate. The best time is about four to six weeks after blooming finishes, when the plant is heading back into active growth.
Take a Y-shaped cutting of two to three joined segments by twisting at the joint rather than cutting. The twisting motion separates cleanly at the natural seam and causes less damage than a blade. Then and this step is where impatient people go wrong let the cut end callous for two to three days on a dry paper towel before planting. Skipping this and putting it straight into moist soil is asking for the cut end to rot before roots even have a chance to form.
Once calloused, plant the cutting about an inch deep in a small pot of the same gritty, well-draining mix I mentioned earlier. Water lightly, keep it in bright indirect light, and resist overwatering while waiting for roots to establish. New pad growth is your sign that roots have taken hold usually within three to six weeks. If you want to learn more about expanding your collection this way, our guide on caring for desert cacti also covers propagation techniques that overlap with this process.
Pests and Problems Worth Knowing About
These plants are fairly tough, but two pests show up with some regularity. Mealybugs like to hide in the joints between pad segments look for small, white, cottony clusters. Spider mites leave fine webbing, usually on the undersides of pads, and tend to appear when the air is very dry.
For a small infestation of either, dab affected areas directly with a cotton swab dipped in rubbing alcohol. For a more widespread problem, a spray of diluted neem oil solution applied to the whole plant including pad undersides works well. Repeat every five to seven days for two to three applications. Always isolate an affected plant from your other houseplants immediately, before you’ve even confirmed what the pest is.
A Quick Year-Round Care Calendar
If you find it helpful to have the full picture in one place, here’s how the year breaks down:
- Spring (March–May): Prune by twisting off one or two outer segments per stem to encourage bushier growth. Repot if the plant has been in the same container for two or more years. Resume regular watering and feeding with a balanced fertilizer every two to three weeks.
- Summer (June–August): Active growing season. Keep in bright indirect light, water when the top inch of soil feels dry, and continue regular feeding. If moving outdoors, choose a genuinely shaded spot.
- Fall (September–October): Begin the bloom-trigger protocol around mid-September. Darkness for 12–14 hours each night, cooler temperatures, reduced watering, no fertilizer. Maintain for six to eight weeks or until buds appear.
- Winter (November–February): Enjoy the blooms. Maintain consistent watering, avoid moving the plant, protect from drafts. After blooms fade, give the plant a rest with reduced watering for about four weeks before resuming normal spring care.
The One Thing That Makes the Biggest Difference
If I had to boil six years of growing these plants down to a single piece of advice, it’s this: the darkness period in fall is not optional. Everything else the right soil mix, the humidity tray, the summer outdoors adds up to a healthier plant. But it’s the six to eight weeks of long, dark nights in September and October that actually gets you flowers. Get that right even once, see those buds forming, and you’ll understand why this plant has been passed down through generations. It rewards consistency more than expertise.