What to Do When Your Orchid Drops Its Flowers (And How to Get It Blooming Again)
Most people think a bare orchid stem means failure. They’re wrong. The first time I saw every single flower drop off my Phalaenopsis within a week, I genuinely thought I’d killed it. I moved it to a different windowsill, changed its water schedule, even talked to it a little (no judgment). None of that was necessary because the plant was perfectly fine. It was doing exactly what orchids are supposed to do. Understanding what’s actually happening when the blooms drop is what separates the people who get repeat flowers from the ones who keep buying new orchids every spring and wondering why.
Your Orchid Isn’t Dead Here’s What’s Actually Going On
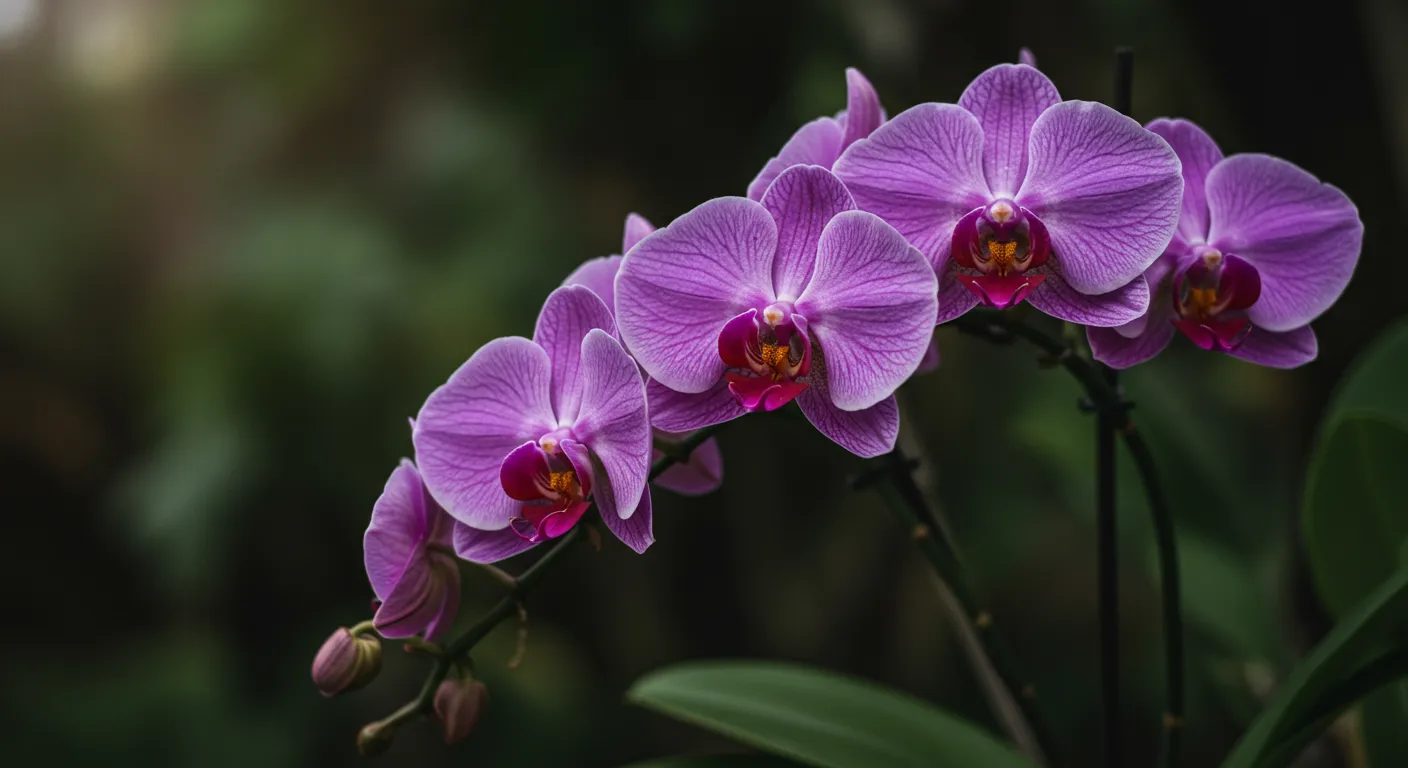
Orchids, especially Phalaenopsis the kind you find at every grocery store and garden center are not like most flowering houseplants. They don’t bloom continuously. They put out one big, energy-intensive flower show for several months, and then they stop. Completely. The flowers drop, the spike looks abandoned, and the plant settles into a resting phase to recover and build reserves for the next bloom cycle.
This dormancy period is non-negotiable. You can’t skip it or rush it. What you can do is support the plant well during this quiet stretch so it has what it needs to come back stronger. What happens in this phase matters more than most people realize.
How to Tell If It’s Resting vs. Actually Struggling
A healthy, dormant orchid gives you clear signals it’s still very much alive. Here’s what to check:
- Leaves are firm and green. They might not be glossy and perfect, but they should feel solid not limp, yellowed, or mushy at the base where they meet the stem.
- Roots look silvery or white and feel firm. You can often see the roots through a transparent plastic grow pot. Silver roots are simply dry and healthy. Bright green means they’ve just been watered. Brown, black, or mushy roots are a red flag.
- The crown is intact. The center point where new leaves emerge should be green and solid. Blackness or softness there is a sign of crown rot, which is a separate, serious problem.
- The stem (spike) may be green or browning. Either is normal at this stage what matters is the leaves and roots, not the spike.
If your leaves are firm and at least some roots look healthy, you’re in good shape. Put down the compost bin.
The Spike Decision: What You Do Next Actually Matters
Once the last flower drops, you’re left with a bare stem. A lot of people just leave it there indefinitely, and that’s actually a mistake especially if it’s browning. What you do with the spike is one of the most consequential decisions in caring for orchids after the flowers fall off, because it directly tells the plant where to send its energy.
Brown Spike? Cut It. Here’s How.
If the spike has gone brown, dry, or papery, it’s finished. The plant has already withdrawn all its nutrients from it. Leaving a dead spike attached doesn’t hurt anything dramatically, but it’s untidy and the plant gains nothing from it. Cut it cleanly about an inch from the base using scissors wiped down with rubbing alcohol. Sterilizing your tools is not optional orchids are surprisingly susceptible to bacterial and fungal infections introduced through a dirty cut. I use a cotton pad soaked in 70% isopropyl alcohol. Takes five seconds. Worth it every time.
Some growers dust the cut end with cinnamon as a natural antifungal. I’ve done it. I’m not fully convinced it makes a measurable difference, but it doesn’t hurt, and it makes you feel like you’re doing something extra for the plant, which counts for morale.
Green Spike? You Have Options Including a Faster Rebloom
Here’s the part most beginner orchid owners don’t know about: if the spike is still green and healthy after the flowers drop, you don’t have to cut it to the base. You can trim it just above a node those small triangular bumps spaced along the stem and the plant may push out a secondary branch from that node, producing new flowers in as little as 8 to 12 weeks.
I’ve had this work beautifully on two of my Phalaenopsis. I’ve also had the secondary spike come out smaller and less impressive than a fresh one from the base. It’s a trade-off between speed and spectacle. If you want blooms faster, try the node cut. If you want the biggest, fullest bloom next time, cut the whole spike at the base and wait for a brand new one to emerge. Either approach is legitimate just go in with the right expectations.
Adjusting Your Care Routine During the Rest Period
This is honestly where most post-bloom orchid care goes wrong. People keep doing exactly what they were doing during the bloom same watering schedule, same fertilizer and then wonder why the roots are rotting. The plant’s needs genuinely change when it’s no longer flowering, and your routine needs to change with it.
Water Less. No, Really Less Than You Think.
With no flowers to support, your orchid’s water demand drops noticeably. If you were watering every seven days during the bloom, stretch that to every ten to fourteen days during dormancy. The real test isn’t a schedule, though it’s the weight of the pot and the feel of the medium. Lift the pot. Does it feel almost weightless? Is the bark or moss completely dry? That’s your watering cue.
When you do water, do it thoroughly. I run mine under the tap for about thirty seconds, letting water flow freely through the drainage holes, then let them drain completely before setting them back in their spots. What I don’t do is let them sit in a saucer of standing water. That’s the fastest route to root rot I know of.
Stop Fertilizing Until You See New Growth
This one trips up a lot of well-meaning plant parents. Fertilizing a resting orchid doesn’t encourage it to bloom faster it causes fertilizer salt buildup in the potting medium, which can burn the roots and create problems you’ll be dealing with for months. I use Dyna-Gro Orchid Pro during the growing season, but I stop completely once the plant is in dormancy and don’t restart until I see a new leaf pushing out or a fresh spike beginning. That’s the signal the plant is back in active growth mode and ready to eat again.
Light and Humidity Still Matter
Dormant doesn’t mean neglected. Your orchid still needs bright, indirect light an east-facing windowsill with gentle morning sun is genuinely ideal for most Phalaenopsis. Direct midday or afternoon sun will scorch the leaves, especially when the plant is conserving energy and less resilient to stress.
Humidity matters more than most people think. Orchids are from tropical environments, and indoor air particularly in winter with heating running is brutally dry. I keep a small Levoit humidifier running near my orchid shelf from October through March. Before I did that, I was dealing with shriveled leaf tips and spider mites every winter. Problem almost entirely went away once I started managing humidity properly. If a humidifier isn’t practical, a pebble tray with water under the pot (not touching the pot’s base) or grouping your plants together will help.
When the Pot Itself Is the Problem: Repotting After Bloom
The post-bloom period is the best window to repot an orchid that needs it not because repotting triggers reblooming, but because the plant isn’t under the stress of flowering, so it recovers more easily. That said, don’t repot just because it seems like a good time. Repot because the plant actually needs it.
Signs That It’s Time to Repot
- The bark has broken down into mush. Orchid bark doesn’t last forever. Over time, it decomposes into a dense, soggy mass that suffocates roots and holds far too much water. This usually happens every 18 to 24 months. Poke through the top if it looks more like compost than bark chips, it’s time.
- Roots are escaping dramatically. Some aerial roots hanging over the rim are completely normal and healthy don’t try to stuff them back in. But if the majority of the root system is circling outside the pot and there’s almost no room left inside, the plant needs more space.
- Root health is poor. If you’re seeing a lot of brown, hollow, or mushy roots when you inspect, those need to come out, and fresh medium needs to go in.
- It’s been more than two years. Even if everything looks okay on the surface, two years is a good benchmark to refresh the potting mix and check the roots.
How to Repot Without Stressing Your Plant Out
Choose a pot only one to two inches larger than the current one. I know the instinct is to give it lots of room to grow, but an oversized pot holds excess moisture and almost guarantees root rot. Transparent plastic nursery pots are my preference being able to see the roots without disturbing the plant is genuinely useful for ongoing monitoring.
Use a potting medium designed specifically for orchids, not regular potting soil. A bark-based mix gives roots the airflow they need. If you’re in a very dry climate or tend to underwater, a mix with some sphagnum moss blended in will help retain a little more moisture without getting waterlogged. Remove the plant from its old pot, tease off all the old medium, then trim any dead roots with sterilized scissors. Settle the plant into its new home, backfill with fresh bark, and here’s the part most guides skip: wait a full week before watering. Any cuts on the roots need time to callus before they’re exposed to moisture. Watering immediately is how you introduce rot into fresh cuts.
Troubleshooting: What Those Leaves Are Telling You
Even a healthy dormant orchid can throw you a curveball. A few of the most common things I see people panic about are actually pretty manageable once you know what they mean.
Yellow Leaves
One yellow leaf on the bottom of the plant is almost certainly just aging that oldest leaf is completing its natural cycle and dropping off. Completely normal. Multiple yellow leaves, or yellowing that starts in the middle of the plant, typically means overwatering or root rot. Cut back on watering, let the medium dry out fully, and if the roots look bad, repot into fresh bark.
Wrinkled or Limp Leaves
Wrinkled leaves mean the plant isn’t getting enough water but the reason might not be that you’re underwatering. If the roots have rotted from previous overwatering, they can’t absorb water even when it’s available, so the leaves dehydrate. Check the roots. Firm, white or silvery-green roots mean you simply need to water more. Brown mushy roots mean you need to deal with the rot first repot, trim the dead roots, let it recover.
Pests
The dormancy period is a good time to do a thorough pest check because you’re handling the plant anyway. Look under the leaves and at the base for mealybugs (white cottony clusters), scale (small brown bumps), and spider mites (fine webbing and tiny dots). If you find something, isolate the plant immediately before it spreads to neighbors. For light infestations, wipe with a cotton swab dipped in rubbing alcohol. For anything heavier, spray with insecticidal soap, making sure to get the undersides of leaves where pests hide. You can check our full guide to indoor orchid care for a deeper breakdown of common pests and how to treat them.
Getting Your Orchid to Bloom Again
Here’s the honest truth: you can’t force an orchid to rebloom on your timeline. What you can do is set up the conditions that make blooming more likely and let the plant do what it naturally wants to do.
The Temperature Drop That Actually Works
This is the single most effective reblooming trigger for Phalaenopsis, and it’s the most underused piece of advice in orchid care. In nature, these orchids experience a noticeable drop in nighttime temperature during the season leading into bloom. You can replicate this by moving your plant somewhere that gets about 10 to 15°F (5 to 8°C) cooler at night for two to four weeks near a window in autumn works well, or a cooler room in the house. Avoid drafts and temperatures below about 55°F (13°C), but a consistent, mild nighttime dip genuinely signals the plant to start initiating a flower spike.
I started doing this with my collection three years ago after a winter where I accidentally left two orchids near a slightly drafty window and those were the two that rebloomed fastest. That accidental experiment made me a believer.
Light, Patience, and What the New Spike Looks Like
Keep providing bright, indirect light during this period. Slightly reduce watering a mild dry stress, combined with the temperature dip, is often enough to push the plant into flowering mode. Then you wait. It can take anywhere from a few weeks to a few months for a new spike to appear. When it does, it’ll emerge from between the leaves as a small green nub. New spikes have a distinctive flattened, almost mitten-shaped tip that distinguishes them from the rounded tips of air roots. Once you’ve seen the difference, you’ll never mix them up again.
The single most useful thing you can do right now today is check your orchid’s roots and assess the state of the potting medium. If the roots are healthy and the medium hasn’t decomposed, your only job is to ease back on watering and let the plant rest. If the roots are struggling or the bark is mush, address that now before it becomes a bigger problem. Everything else the temperature tricks, the spike decisions, the fertilizer timing comes after you’ve confirmed the foundation is solid.