Phalaenopsis Orchid Care: What Most Guides Get Wrong (And What Actually Works)
Most Phalaenopsis orchids don’t die from neglect they die from being cared for too much. I say this as someone who killed his first two with what I thought was attentive, loving care. I watered them on a schedule. I fed them every week. I even misted the leaves because I’d read somewhere that they love humidity. Both were rotted from the roots up within three months. The fix, it turned out, was doing considerably less.
Once I figured out what these plants actually need as opposed to what feels nurturing to us they became some of the most rewarding plants in my collection. I currently have eleven Phalaenopsis in various stages of growth, bloom, and rest, and most of them practically take care of themselves. Here’s everything I’ve learned.
What Kind of Plant You’re Actually Dealing With
The single most useful thing you can know about a Phalaenopsis orchid is that it doesn’t grow in soil in the wild. It grows on trees. It’s what botanists call an epiphyte a plant that clings to bark, dangles its roots in open air, and absorbs moisture from rain and humidity as it passes through.
This one fact explains almost every care decision you’ll ever make. It’s why you pot them in chunky bark instead of dirt. It’s why drainage and airflow matter more than moisture retention. And it’s why that well-intentioned daily watering is essentially drowning a plant that evolved to dry out completely between rains.
The Lifecycle You Need to Understand
Phalaenopsis follow a predictable annual rhythm. After blooming, they shift into a vegetative growth phase where they quietly build new leaves and extend their root system. Then, typically after a cooler period in autumn or winter, they throw up a new flower spike. Then they bloom. Then they rest. Then the cycle repeats.
New orchid owners often panic during the rest phase because the plant looks like it’s doing nothing. It isn’t. It’s just recharging. As long as the leaves are firm and the roots are healthy, you have nothing to worry about. The plant knows what it’s doing better than we do.
Light: The One Thing Most People Get Wrong First
Phalaenopsis need bright, indirect light but “indirect” doesn’t mean dim. I made this mistake early on. I had an orchid sitting six feet back from a north-facing window, thinking I was protecting it from harsh sun. What I was actually doing was starving it of the light it needed to produce a flower spike.
The sweet spot is an east-facing window where the plant gets gentle morning sun, or a south or west window with a sheer curtain to diffuse the more intense afternoon light. Your goal is to replicate the dappled canopy light of a tropical forest bright overall, but never direct and scorching.
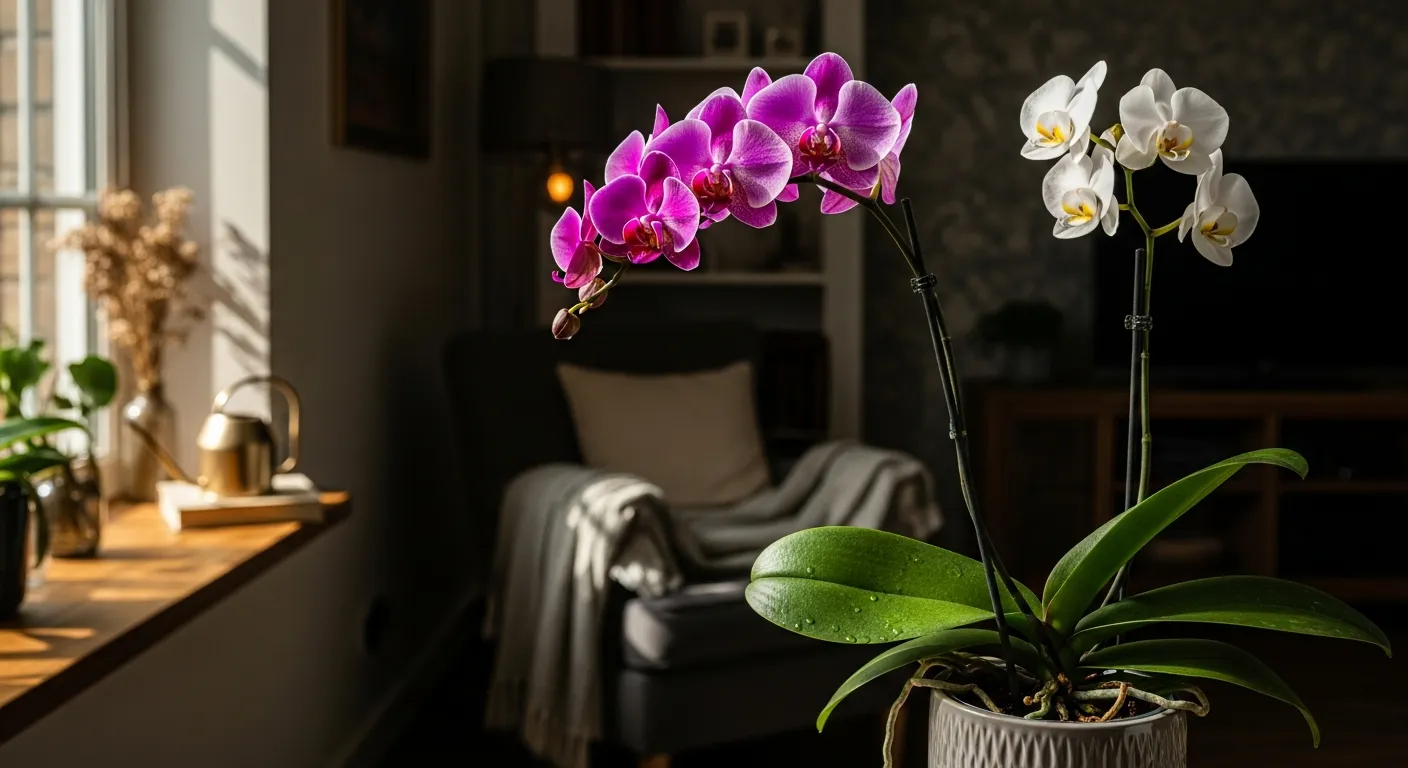
The leaves will tell you if you’ve got it right. Healthy Phalaenopsis leaves are a medium olive green. Dark, glossy green means it wants more light. Yellow leaves with reddish edges mean it’s getting too much direct sun and starting to burn.
Watering: How to Stop Killing Them With Kindness
Forget whatever watering schedule you’ve been following. Orchids don’t run on a calendar they run on their own moisture cycle, which changes with the season, your home’s humidity, and the size of the pot.
The most reliable way to water is to check the roots, not the calendar. If you’re growing in a clear plastic pot (which I strongly recommend for beginners), look at the root color. Silvery-gray or white roots are thirsty roots. Bright green roots still have moisture. When the roots are mostly gray, it’s time to water.
When you do water, do it properly. Take the pot to the sink, run lukewarm water slowly through it for about a minute, and let it drain completely. Every last drop should run out before you set it back down. Never leave a Phalaenopsis sitting in a saucer of water that standing water is an invitation for root rot.
One trick I use: after watering, I lift the pot. Then I lift it again three or four days later. When it feels significantly lighter, I start checking the roots. You develop a feel for it over time that’s more reliable than any schedule.
What About Ice Cubes?
You’ve probably seen those “three ice cubes a week” orchid care instructions that come with supermarket plants. Please ignore them. Phalaenopsis are tropical plants. Cold water stressed onto their roots causes cellular damage it’s the horticultural equivalent of making someone stand barefoot in the snow because you read they like cool temperatures. Use room-temperature water, always.
Temperature, Humidity, and the Environment That Makes Them Thrive
The good news here is that Phalaenopsis are comfortable in the same conditions most humans prefer: temperatures between 65–80°F (18–27°C), moderate humidity, and good air circulation. They’re not asking for much.
Humidity is worth paying attention to if you live somewhere with dry winters. These orchids prefer 50–70% relative humidity significantly higher than the 30–40% typical in a heated home during winter. You don’t need a greenhouse. A pebble tray filled with water beneath the pot, or grouping your orchids together, raises the local humidity enough to make a real difference. I run a small humidifier in my plant room from November through March and it’s made a noticeable difference in root health across my whole collection.
What people underestimate is air circulation. Stagnant, humid air is actually worse than dry air with good movement. A gentle fan on a low setting nearby prevents the fungal and bacterial issues that thrive in still, moist conditions. I learned this the hard way after losing a beautiful pink Phal to crown rot water had pooled in the center of the leaves with no airflow to dry it out.
Feeding Your Orchid Without Overdoing It
The standard advice here is sound: feed weakly and frequently during the growing season, and ease off during rest. I use MSU Orchid Fertilizer at about a quarter of the recommended strength every time I water throughout spring and summer. It’s a low-urea formula that’s gentle on roots and effective over the long term.
The counterintuitive part of fertilizing that most guides skip over: never fertilize a dry orchid. The concentrated nutrients in fertilizer can burn already-stressed roots. Always water first, let it drain, then apply diluted fertilizer. And flush the potting mix with plain water once a month to prevent mineral salt buildup, which can damage roots silently over time even with low-dose feeding.
When you’re trying to trigger a bloom spike, switch to a fertilizer with a higher phosphorus ratio often marketed as “bloom booster.” Pair that with a 10–15°F temperature drop at night for a few weeks, and most healthy Phalaenopsis will respond with a new spike within a month or two.
What to Do When the Flowers Finally Drop
The blooming period on a healthy Phalaenopsis can last two to three months, which is genuinely remarkable for a houseplant. When the last flower finally falls, you have a decision to make about the spike.
You have two real options:
- Cut the spike to the base about an inch above where it emerges from the plant. This tells the orchid to invest its energy in new leaves and roots, which leads to a stronger, more robust bloom spike the next time around. I do this with most of my plants and prefer the results long-term.
- Cut above a node for a faster rebloom find a healthy triangular node bump below where the first flower opened, and cut the spike about an inch above it. This can trigger a secondary branching spike within 8–12 weeks. The flowers will be fewer and smaller, but they’ll arrive faster. Good option if you’re impatient or the plant is otherwise in excellent health.
Whichever you choose, sterilize your cutting tool first. A quick wipe with isopropyl alcohol takes five seconds and prevents bacterial and fungal infection from entering the fresh cut. I use a basic box cutter I keep near my plant shelf nothing fancy required.
Repotting: When, Why, and How to Do It Without Stressing the Plant
Most Phalaenopsis need repotting every 18 months to 2 years. The potting bark breaks down over time, compacts, holds moisture longer than it should, and eventually starts suffocating the roots it’s supposed to protect. You’ll know it’s time when the bark looks more like soil than chunks, when roots are circling the pot or pushing the plant upward, or when you notice the medium stays wet for longer than usual after watering.
Never repot while the plant is actively blooming unless the roots are in genuine crisis. Wait until the spike has been cut and the plant has had a few weeks to settle into its post-bloom rest.
Choosing the Right Pot and Mix
Go one size up literally just one to two inches larger in diameter than the current pot. A pot that’s too large holds excess moisture that the roots aren’t using, creating the exact soggy conditions that cause rot. A snug, well-draining pot beats a spacious one every time.
For the mix, use a quality orchid bark blend fir bark with some perlite or charcoal works well. I’ve tried a few brands over the years and currently use rePotme’s Classic Orchid Mix, which has good chunk size and drainage. Avoid anything described as “moisture-retaining.” That is the opposite of what you want.
The Repotting Process Step by Step
- Ease the plant out gently squeeze the sides of a plastic pot to loosen roots. If they’re truly stuck, it’s easier to cut the pot away than risk tearing healthy roots.
- Remove all the old medium shake it off, rinse the roots if needed, and get a clear view of what you’re working with.
- Trim dead roots with sterilized scissors healthy roots are firm and either silvery-white or green. Mushy, brown, or papery roots should be cut back to healthy tissue. Don’t be squeamish; leaving dead roots in the pot just creates rot pathways.
- Position in the new pot hold the plant so the base sits just below the rim, then work fresh bark around the roots. A chopstick helps to poke the medium into gaps without compacting it.
- Wait a week before watering this gives any cut root ends time to callous over. It feels counterintuitive, but it’s important for preventing infection at fresh wounds.
Diagnosing Common Problems
Yellow Leaves
If the oldest, lowest leaf turns yellow and drops off, that’s normal the plant is just shedding old growth. If multiple leaves are yellowing, especially the newer ones, overwatering and root rot are the most likely cause. Un-pot the orchid and look at the roots. Healthy roots are firm. Rotten roots are brown and mushy and often smell unpleasant. Trim the bad ones, let the plant dry out, repot in fresh bark, and dial back your watering frequency.
Wrinkled or Leathery Leaves
This is dehydration but not always from underwatering. If the roots have rotted, the plant physically can’t take up water even if the medium is wet. Check the roots first. If they’re healthy and the medium is bone dry, you’re simply underwatering. If they’re rotted, treat the root rot and the leaves will recover once the plant can absorb moisture again.
Buds Dropping Before They Open
This is called bud blast, and it’s caused by sudden environmental stress. The most common triggers are cold drafts (from windows, AC vents, or being near an exterior door), very low humidity, or being moved to a new location right as buds were forming. Keep your orchid in a stable spot away from drafts when it’s budding, and resist the urge to move it to show it off before those buds have fully opened.
Common Pests
- Mealybugs look like small white cotton tufts, usually hiding in leaf joints and where leaves meet the stem. Remove them with a cotton swab dipped in rubbing alcohol and check again every few days until they’re gone.
- Spider mites you’ll notice fine webbing on the undersides of leaves and a silvery, stippled texture to the leaf surface. Wipe leaves with a damp cloth and improve air circulation. They thrive in hot, still, dry conditions.
- Scale insects small brown bumps attached firmly to leaves or stems. They look almost like part of the plant, which is why they’re often missed. Scrape them off gently with a soft toothbrush and treat with neem oil if the infestation is significant.
Frequently Asked Questions
What are those roots growing out of the pot?
Those are aerial roots, and they’re a good sign. Phalaenopsis grow on trees in the wild, and their roots are designed to extend into open air to absorb moisture and even photosynthesize. Leave them alone cutting healthy aerial roots stresses the plant unnecessarily. The only time you’d remove them is if they’re completely dry, brown, and papery, which means they’ve died off on their own. If you want to read more about managing them, I’ve written a full breakdown in my guide to orchid aerial roots.
How long do the flowers last?
Typically two to three months on a healthy plant. Temperature fluctuations, low humidity, and drafts can shorten that window considerably. Stable conditions are the best thing you can do to extend the bloom period.
Why won’t mine rebloom?
The most common reasons are insufficient light, no temperature drop to trigger spiking, or a plant that simply hasn’t had enough time to recover from its last bloom. Make sure it’s getting bright indirect light, give it a period of slightly cooler nights (10–15°F cooler than daytime) for three to four weeks in late summer or autumn, and be patient. A healthy Phalaenopsis that’s well-fed and well-lit will rebloom it just runs on its own schedule.
The One Thing That Changes Everything
If I had to distill ten years of growing Phalaenopsis into a single piece of advice, it would be this: learn to read the roots. Root color tells you when to water. Root texture tells you whether the plant is thriving or struggling. Root quantity tells you whether it’s ready to repot. Get in the habit of actually looking at them which is much easier with a clear pot and almost every common Phalaenopsis problem becomes either preventable or immediately diagnosable.
These are genuinely forgiving plants once you stop projecting human logic onto them. They don’t need daily attention. They need the right conditions and then, mostly, to be left alone.