Baby Orchid Care: What Actually Keeps a Keiki Alive (And What I Wish I’d Known Sooner)
I killed my first keiki within three weeks of separating it from the mother plant. Didn’t even make it to its first proper watering routine. The mistake? I got impatient and cut it off before it had grown more than one stubby little root. It looked ready to me. It was not. That failure taught me the single most important rule about raising young orchids, and honestly, everything else I know about baby orchid care flows from that one lesson: the plant will tell you when it’s ready your job is to listen, not to rush.
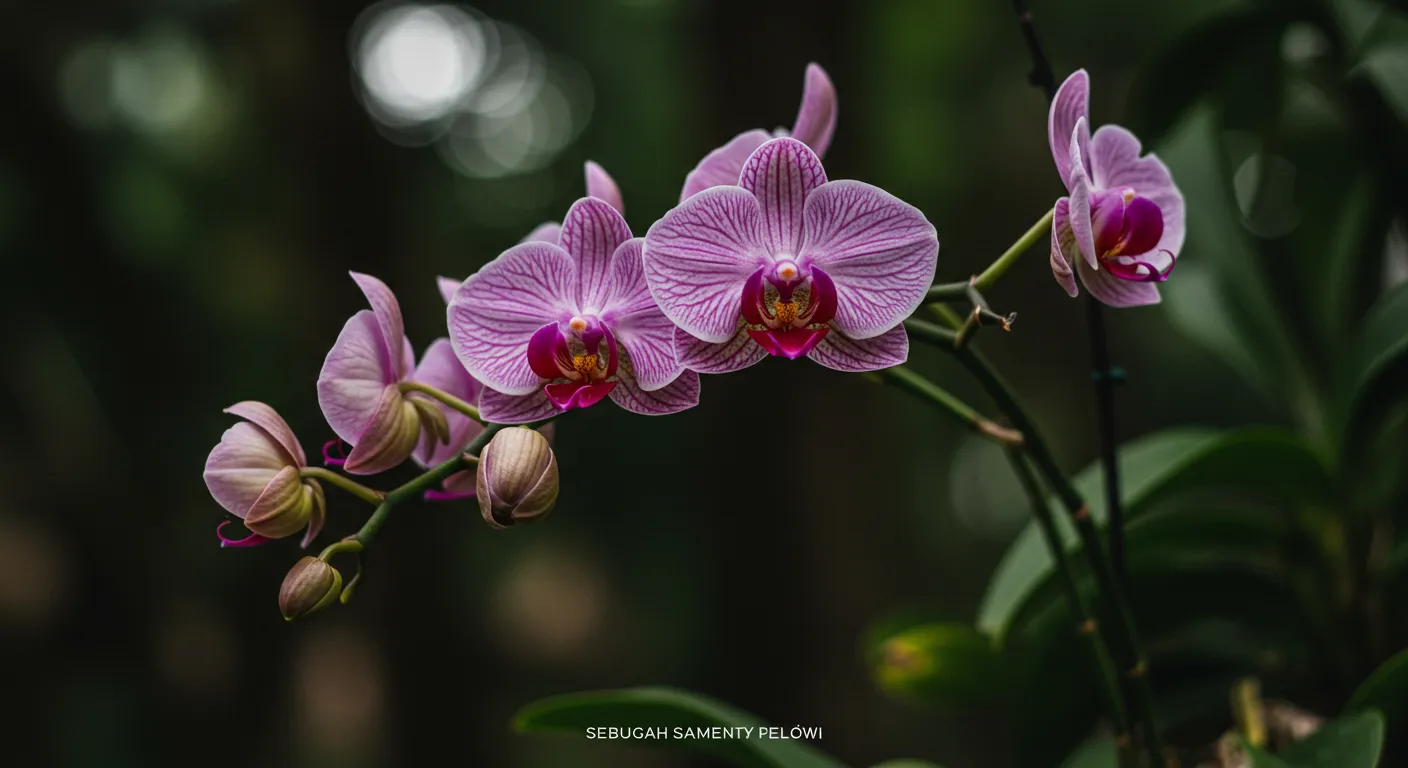
What a Keiki Actually Is (And Why Your Orchid Made One)
A keiki the word is Hawaiian for “baby” or “child” is a genetically identical clone that your orchid produces on its own. On Phalaenopsis orchids, they typically sprout from a node on the flower spike. On Dendrobium varieties, they’ll pop up along the canes. Either way, it’s your plant essentially making a copy of itself.
Here’s something most beginner guides won’t mention: keikis are sometimes a stress response. An orchid that’s been through an environmental shock temperature swings, inconsistent watering, or a rough repotting may produce a keiki almost as a survival instinct. So while it’s genuinely exciting to find one, it’s also worth taking a look at how the mother plant is doing overall. Sometimes a keiki is a gift; sometimes it’s a distress signal wearing a cute disguise.
The “1-2-3 Rule” When It’s Actually Safe to Separate
I now follow a simple rule before I ever touch my scissors, and it’s saved me from repeating that early mistake many times over. The keiki needs to hit three marks before it earns its own pot:
- At least one leaf of its own. A single leaf shows the keiki can photosynthesize independently it’s no longer fully parasitic on the mother plant’s resources.
- Two or three visible, healthy roots. Not stubs. Actual roots, firm and clearly growing. If they look pale and papery or haven’t extended past the base, wait another few weeks.
- Roots at least two to three inches long. Short roots snap easily during separation and can’t anchor the baby in new media. Length gives you something to work with and gives the plant a real fighting chance.
I’ve watched keikis hit this threshold in as little as six weeks and as long as six months. The variation is completely normal and depends on the season, the mother plant’s health, and conditions in your space. Don’t set a calendar reminder just check on it weekly.
Potting a Keiki for the First Time Without Wrecking It
Once your keiki passes the readiness test, the actual separation and first potting is straightforward but a few small details make a real difference.
Use a sterilized blade. I clean mine with isopropyl alcohol every single time, even if I just used it on another plant. Orchids are surprisingly vulnerable to bacterial and fungal infection through fresh cuts. Leave about an inch of the spike or cane attached to the keiki when you cut it acts as a handle during potting and reduces the risk of damaging the roots.
Choosing the Right Pot Size (Smaller Than You Think)
New growers almost always go too big on the first pot. I understand the instinct you want to give the little thing room to grow but oversized pots stay wet for too long, and wet media around underdeveloped roots is a fast track to rot. A two- or three-inch pot is genuinely the right size. Cozy, not cramped.
For potting media, I’ve had the best results with a fine-grade fir bark mix specifically the rePotme Fine Orchid Mix, which I’ve been using for a few years now. It drains quickly, holds just enough moisture between waterings, and doesn’t compact into a wet brick the way sphagnum moss can if you’re not careful. That said, a light sphagnum moss works fine too, especially in drier climates where moisture retention matters more.
When you pot the keiki, don’t pack the media tightly. Work it gently between the roots and let them find their position naturally. The goal is contact with the media, not compression.
Light, Humidity, and Temperature Getting the Environment Right
Young orchids are more sensitive to their environment than mature plants. The root system is still developing, which means the plant is relying more heavily on atmospheric moisture and leaf absorption to stay hydrated. Get the environment wrong and you’ll spend weeks troubleshooting symptoms that are really just one root cause.
Light: More Forgiving Than You’d Expect
The common advice to give orchids “bright indirect light” is correct but vague. Here’s how I actually think about it: if the shadow your hand casts on the pot is sharp and defined, that spot is probably too intense for a young orchid. If there’s barely a shadow at all, it’s too dim. You want something in between a soft, blurry shadow.
An east-facing window is nearly always a good starting point. A few feet back from a south- or west-facing window also works, especially with a sheer curtain in front. One thing I learned the hard way: even gentle winter sun through south-facing glass can scorch pale young leaves faster than you’d expect. If you notice bleached or brownish patches appearing on the upper surface of a leaf, the light is too direct.
Humidity: The Number That Actually Matters
Aim for 50–70% relative humidity. Below that, a keiki’s leaves will start to look a little pinched and wrinkled even when the roots have moisture, because it simply can’t absorb enough through the air. I keep a small digital hygrometer near my orchid shelf they’re inexpensive and they remove all the guesswork.
- A pebble tray with water beneath the pot is the simplest solution and genuinely works for modest humidity boosts. Just make sure the pot itself isn’t sitting in the water roots need airflow, not a bath.
- Grouping plants together creates a shared humid microclimate through transpiration. My orchid corner has about a dozen plants clustered together, and the ambient humidity there is consistently higher than the rest of the room.
- A small ultrasonic humidifier is the most reliable option if your home runs especially dry in winter. I run one on a timer during dry months and it made a noticeable difference in how quickly my keikis established.
Temperature is less finicky than most guides suggest a consistent 65–80°F (18–27°C) covers most household orchid varieties just fine. What matters more than the exact number is stability. Keep young orchids away from heating vents, drafty windows, and air conditioning units. A sudden ten-degree swing overnight does far more damage than a temperature that’s a few degrees outside the ideal range.
Watering and Feeding Without Overdoing Either
Here’s a counterintuitive one: baby orchids need more frequent watering than their mature counterparts, but in smaller amounts. Because their pots are tiny and their root systems are still building, they dry out faster but they’re also the first to suffer root rot if you let them sit wet.
My rule is to check the media every two to three days rather than watering on a fixed schedule. Push a wooden skewer or your finger into the top inch of the media. If it comes out clean and dry, water thoroughly. If there’s any moisture clinging to it, give it another day. The pot will also feel noticeably lighter when it’s ready after a while you’ll just know by feel.
How to Water a Keiki Properly
Take the pot to a sink. Pour lukewarm water I use filtered tap water slowly over the media until it runs freely from the drainage holes. Then let it drain completely before putting it back. Never let a baby orchid sit in a saucer of standing water. That’s probably the single fastest way to lose one.
Rainwater is genuinely better if you have access to it. I collect it in a couple of buckets during rainy months and use it throughout the year. My keikis root faster and show fewer tip burns on their leaves compared to tap water. It’s a small thing, but it adds up.
Feeding Young Orchids: Less Really Is More
The “weakly, weekly” rule is the right one: use a balanced orchid fertilizer (20-20-20 works well) at one-quarter the strength listed on the label, applied once a week during active growing season. I use MSU Orchid Fertilizer, which is formulated for use with most water types it’s become a permanent fixture in my plant cabinet.
Once a month, skip the fertilizer entirely and flush the pot with plain water twice in a row. This rinses out accumulated mineral salts that can slowly damage roots even when concentrations seem low. It takes an extra five minutes and it’s genuinely worth it.
The First Repotting and What Comes After
When you see roots circling the inside of the pot, pushing through drainage holes, or when the bark mix has broken down into something more resembling soil than chunks, it’s time to move up. Usually this happens within one to two years for a healthy keiki.
Step up by just one pot size typically to a four-inch container. Going larger than that reintroduces the same moisture-retention problem you managed at the start.
How to Repot Without Damaging the Root System
Remove the orchid gently. If it’s stuck, squeeze the sides of a plastic pot or run a thin sterilized blade along the inner edge. Shake off the old media and take a good look at the roots. Firm roots that are white, silvery, or bright green when wet are healthy. Roots that are black, mushy, hollow, or papery are dead trim them cleanly with sterilized scissors. Don’t be squeamish about this; leaving dead roots in the pot creates a breeding ground for rot and fungus.
After repotting, hold off on watering for about a week. Any trimmed root ends need time to callous over. Then resume your normal watering routine.
Dormancy, Blooming, and the Temperature Trick Worth Knowing
After a growth phase, your orchid may slow down noticeably fewer new leaves, no visible root tips extending. This is dormancy, and it’s normal. Reduce watering frequency and stop fertilizing until you see signs of active growth returning.
For Phalaenopsis, triggering a flower spike often requires a drop in nighttime temperature. Move the plant to a spot where temps fall by about 10–15°F (5–8°C) at night for three to four weeks near a slightly drafty window in autumn often does the trick. I put several of mine on a windowsill ledge in October and by November, almost all of them had new spikes emerging. Once you see that spike, move the plant back to its regular warm spot and keep conditions consistent until it blooms.
Reading Problems Early: Yellow Leaves, Wilting, and Root Rot
Yellow leaves cause more panic than they should. A single lower leaf yellowing on an otherwise healthy plant is just normal leaf senescence orchids shed old leaves as they grow, exactly like most plants. Let it yellow fully and remove it cleanly.
Multiple leaves yellowing, especially if they feel soft or mushy, is a different story. That’s almost always overwatering and possible root rot. If you see this, unpot the plant, inspect the roots, trim anything that’s gone dark and soft, and repot into fresh dry media. Cut back watering significantly and let it recover.
Limp, wrinkled leaves that aren’t yellowing usually indicate the opposite problem underwatering or low humidity. The distinction matters because the treatments are completely different, and misdiagnosis wastes time the plant doesn’t always have.
For a deeper look at what happens after your orchid blooms for the first time including how to handle spent spikes and what to do when flowers drop the guide on caring for orchid blooms picks up right where this one leaves off.
The One Thing That Makes the Biggest Difference
If you only take one thing from all of this: check your roots before you do anything else. Every problem I’ve encountered with baby orchid care overwatering, stunted growth, failed repots traces back to root health. Healthy roots mean a healthy plant. Get in the habit of inspecting them regularly, and you’ll catch problems early enough to actually fix them. The rest of the care routine matters, but it all starts there.