
Monstera Plant Care Fertilizer: What Actually Works (Timing, Types & Mistakes)
Getting your monstera plant care fertilizer routine right is one of the biggest differences between a plant that merely survives and one that genuinely thrives. Most houseplant fertilizers sit unopened under the sink for months — because nobody’s quite sure if they should use them, or how. I was that person for the first two years of growing Monsteras. I assumed my plant was “fine” because it wasn’t dying, until I started feeding it properly and watched it push out three new leaves in six weeks. That’s when I realized I hadn’t been keeping it alive. I’d been keeping it trapped.
Here’s what I’ve learned after a decade of trial, error, and a few genuinely regrettable fertilizer burns: feeding a Monstera well isn’t complicated, but getting the details right makes a real difference. Let me walk you through exactly what works.
Why Monstera Plant Care Fertilizer Matters More Than You Think
In the wild — the cloud forests of Mexico and Central America — Monstera deliciosa grows in soil that’s constantly being replenished. Fallen leaves decompose, insects do their thing, rainfall carries minerals down from the canopy. The plant never experiences a nutrient shortage because the system keeps refilling itself.
Your potted plant doesn’t have that luxury. It’s working from a fixed reserve that came in the bag of potting mix. Every time you water, some of those dissolved nutrients drain out the bottom. After about three to four months, the soil is essentially nutritionally exhausted — there’s still plenty of organic material in there, but not the usable mineral nutrients your Monstera actually needs to build new tissue.
This is why a plant can sit in the same pot for a year looking “okay” while never really thriving. It’s not sick. It’s just running on empty. A consistent monstera plant care fertilizer practice is the thing most indoor growers skip — and the thing that separates plants that survive from plants that genuinely flourish.
Breaking Down Those Three Numbers on the Label
Every fertilizer sold commercially lists three numbers — something like 20-20-20 or 5-2-3. These represent the percentage by weight of nitrogen (N), phosphorus (P), and potassium (K). Understanding what each one actually does helps you choose the right product instead of just grabbing whatever’s on the shelf.
Nitrogen, Phosphorus, and Potassium — What Each One Actually Does
Nitrogen is the one your Monstera cares about most. It drives leaf and stem production and is directly responsible for that deep, saturated green color you want in healthy foliage. When nitrogen runs low, you’ll notice older leaves turning uniformly pale or yellow — not in patches, but evenly across the whole leaf surface.
Phosphorus supports root development and energy transfer within the plant. You’ll rarely see a dramatic phosphorus deficiency in a houseplant (it’s more common in outdoor crops), but if your Monstera’s leaf undersides develop a purplish or reddish tinge, that’s worth noting. It matters more during establishment after repotting.
Potassium handles water regulation, structural strength, and disease resistance. A potassium-deficient plant often shows brown, scorched-looking edges on the leaves — which a lot of people mistake for underwatering or low humidity. If you’ve ruled those out and the edges keep browning, look at your fertilizer’s K value.
For Monstera, a balanced ratio like 20-20-20 covers all the bases for general maintenance. If your plant is in an active growth phase in late spring, a formula slightly heavier in nitrogen (something like a 3-1-2 ratio) can support that push. One thing to avoid: high-phosphorus blends marketed for flowering plants. Your Monstera is all about the foliage — those formulas are wasted on it.
Which Fertilizer Format Is Actually Worth Using
The form the fertilizer comes in changes how it behaves and how easy it is to correct mistakes.
Liquid Formulas — The Most Forgiving Option
Liquid fertilizers are diluted in water and applied during regular watering. They’re fast-acting, easy to control, and most importantly reversible. If you accidentally apply too much, flushing the soil with plain water dilutes and drains the excess. For anyone who’s ever torched a plant with over-fertilizing (raises hand), this “undo button” is genuinely valuable.
I use Dyna-Gro Foliage Pro at half the recommended dilution rate. It’s a 9-3-6 formula that leans slightly toward nitrogen without neglecting the other nutrients, and it’s been reliable across most of my tropical plants. There are other solid options out there, but this is the one that’s stayed in my rotation.
Slow-Release Granules — Convenient but Less Controllable
Pellets or granules are mixed into the top layer of soil and break down gradually over three to six months. They’re great if you’re the type who forgets to fertilize — set it and largely forget it. The downside is that once they’re in the soil, you can’t easily pull them back out if you’ve overdone it. Use less than the package suggests, especially for indoor plants where the soil volume is small and the risk of salt buildup is real.
Worm Castings — Slow, Gentle, and Surprisingly Effective
I keep a bag of worm castings on my potting bench year-round. They’re essentially impossible to over-apply, they improve soil structure, and they add microbial life that helps the plant uptake whatever nutrients are present. A light top-dressing every six to eight weeks won’t replace a proper feeding schedule, but it makes a noticeable difference in soil health over time. Think of it as a supplement, not a replacement.
The Seasonal Rhythm Your Feeding Schedule Has to Follow
Here’s the counterintuitive part that trips up a lot of growers: feeding your Monstera year-round isn’t just unnecessary — it actively causes problems.
Spring and Summer: Feed Consistently
From roughly March through September, your Monstera is in full production mode — photosynthesizing actively, developing new leaves, extending its root system. This is the window when fertilizer actually gets used. Feed every two to four weeks with a diluted liquid formula, and watch for new growth as confirmation things are working. A plant that starts pushing larger, more deeply fenestrated leaves after a month of feeding is responding exactly as it should.
Fall and Winter: Stop Completely
As light levels drop in autumn, Monstera’s metabolism slows significantly. The roots are still alive and doing minor work, but the plant isn’t in a growth phase — it’s conserving. Any fertilizer you apply now doesn’t get processed; it just accumulates in the soil as salt. Over a winter of well-intentioned feeding, you can build up enough residue to damage roots and cause the exact leaf problems you were trying to prevent.
I stop all feeding in October and don’t restart until I see a new leaf unfurling in spring. That’s my signal that the plant is back in gear.
After Repotting: Wait Longer Than You Think
Fresh potting mix already contains starter nutrients. Applying monstera plant care fertilizer within the first month or two of repotting risks concentrating too many minerals in the root zone at a time when the roots are already stressed from being disturbed. Wait at least six to eight weeks post-repot before introducing any supplemental feeding.
How to Apply It Without Damaging the Roots
Root burn is almost always caused by one of two things: applying fertilizer to dry soil, or using too strong a concentration. Both are easy to avoid.
- Always water before you fertilize. Moist soil acts as a buffer — the dissolved fertilizer disperses through the existing moisture rather than making direct, concentrated contact with the roots. Dry soil amplifies the risk of burning significantly.
- Cut the recommended dose in half. Package directions are typically calibrated for outdoor plants or high-production growing environments. Indoor Monstera in a moderate-sized pot needs far less. Starting at half strength gives you room to adjust upward if needed, and you’ll rarely need to.
- Pour evenly across the full soil surface. Concentrating liquid fertilizer directly at the stem base, where the root flare is, creates a hot spot. Spread it across the surface and let it soak down to the drainage holes.
- Skip the feed on hot, bright days. Heat stress and nutrient stress at the same time is a reliable way to damage a plant. If your room is unusually warm or the plant is in stronger-than-normal light, hold off until conditions normalize.
Reading the Signs: Is Your Monstera Over-Fed or Under-Fed?
Both problems are common, and they look different enough that you can usually tell them apart if you know what to watch for.
When the Plant Isn’t Getting Enough
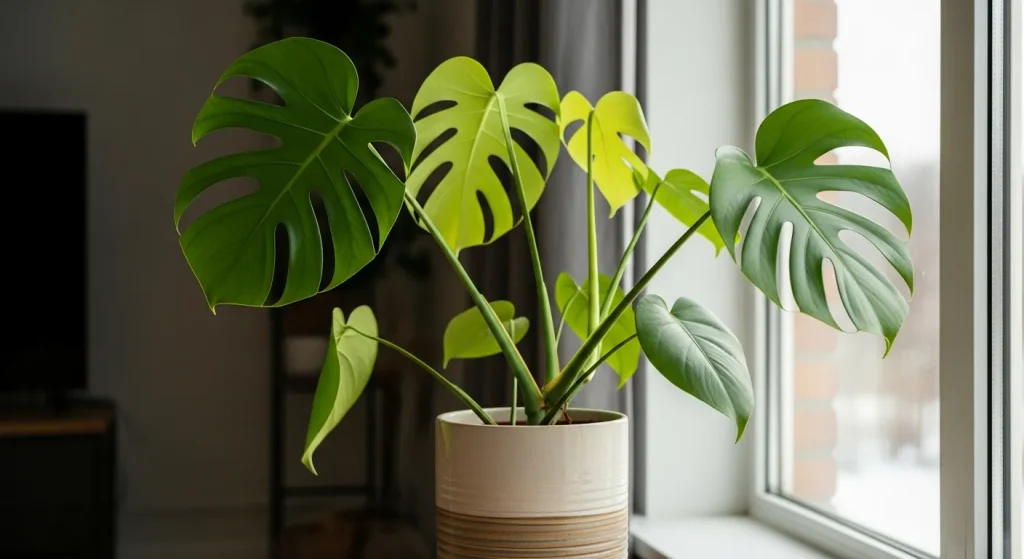
Under-fertilizing is the more common mistake — in my experience most people just don’t feed at all. A plant running low on nutrients typically shows slow or stalled growth during peak season, older leaves going uniformly pale yellow, and new leaves that come in noticeably smaller than previous ones. The most telling sign, for Monstera specifically, is leaves that are reaching mature size but showing few or no fenestrations — the iconic splits that make the plant so recognizable. Fenestrations are partly a light response, but they’re also a nutrition response. A well-fed Monstera in good light produces them earlier and more reliably.
When You’ve Gone Too Far
Over-fertilizing produces a specific and recognizable pattern: crispy brown tips and edges on otherwise healthy-looking leaves, a white or yellowish crust forming on the soil surface or around the drainage hole (that’s salt residue), and in bad cases, leaves wilting even when the soil is moist — which means root damage has affected the plant’s ability to take up water at all.
I did this once with a large Monstera Thai Constellation — convinced myself it needed more nitrogen to push a new leaf faster, doubled my usual dose. Within two weeks the leaf tips were brown on three separate leaves. The fix worked, but it took about six weeks to fully recover.
How to Fix Over-Fertilizing
Stop feeding immediately. Take the plant to a sink and run water through the pot slowly for three to five minutes, letting it drain fully — this flushes the excess salts out through the drainage holes. Repeat the flush after thirty minutes. Move the plant to slightly lower light while it recovers (less demand on the root system), and don’t reintroduce feeding for at least six weeks. When you do restart, use quarter strength for the first application.
Feeding Is the Last Piece, Not the First
Worth saying clearly: no amount of careful monstera plant care fertilizer work will compensate for poor light or overwatered roots. A plant in inadequate light physically cannot process nutrients efficiently — the photosynthesis isn’t happening at the rate needed to use what you’re giving it. A plant with rotting roots can’t absorb anything at all, and adding fertilizer to that situation makes it worse.
Before adjusting your feeding routine, make sure the foundations are solid. Bright, indirect light for most of the day. Soil that dries out moderately between waterings. Drainage holes that actually drain. Once those are in order, a consistent feeding schedule from spring through late summer will produce a visibly different plant — larger leaves, richer color, and those deep fenestrations that make a Monstera worth growing in the first place.
If you’ve never fertilized your Monstera before and it’s currently in the growing season, start there. Half-strength balanced liquid fertilizer, once a month, in moist soil. That’s it. You’ll likely see a new leaf within a few weeks, and it’ll probably be the biggest one the plant has ever produced. That’s the thing about plants — they respond quickly when you finally give them what they need.
If you’re also thinking about repotting while you’re in “refresh mode” with your Monstera, my guide on when and how to repot Monstera covers exactly what soil mix to use and how to avoid the common mistakes that stress the plant during the transition.